Navigation: Sales → Leads
A Lead is created when an individual or business shows potential of receiving services and provides his or her contact information. Lead is not yet a sales opportunity, meaning that further qualification of the lead is necessary to determine intent and interest.
Review Lead form
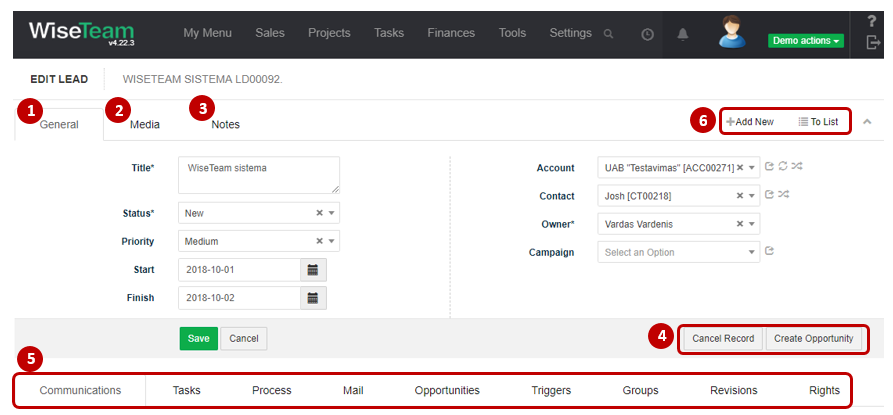
1. General information about Lead is provided in tab General. You have to fill in this information when creating new Lead.
2. In tab Media it is possible to attach files. Click Select Files or do Drag & Drop.
3. In tab Notes it is possible to leave notes. Click Add note to create new note.
4. Actions that can be taken with Leads:
- Cancel Record: Lead receives status Canceled. When the record is canceled, opens the modal window of the record with the reason and end date fields.
- Create Opportunity: Lead receives status Done and becomes Opportunity as soon as the need is identified and business or individual shows his interest further.
5. Available Info Tabs:
- Communications: allows assigning Lead contact information. Click
 to add new type of communication and fill information.
 - Tasks: allows creating and managing tasks of various types related to the Lead. Click to add new Task or
 and select Process to generate Tasks from a template.
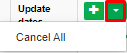
 - Process: allows initiating processes and seeing the progress of initiated processes. If multiple processes are running, you can cancel active processes with Cancel all at the same time,
 .
. - Mail: allows seeing, creating and assigning related emails. Click
 to create new email. Click to assign email.
 - Opportunities: allows seeing Opportunity that was generated from particular Lead.
- Triggers: allows seeing and creating task process triggers related to particular Risk. Click to add new Process Trigger record.
- Groups: allows grouping Leads according to types determined (list is taken from Settings → Groups).
- Revisions: allows seeing the history of actions taken with the Lead.
- Rights: allows setting rights for users relevant to the Lead.
6. Available navigation buttons:
- Add new: is used to create new Lead.
- To list: is used to go to the list of Leads.
Create new Lead
To create new Lead follow these steps:
1. Go to Sales → Leads.
2. In the list of Leads click ![]() to add new Lead.
to add new Lead.
3. Fill in fields in tab General:
- Title: shortly indicates what the Lead is about.
- Status: indicates status of the Lead to orient what actions should be taken (list is taken from Settings → Dictionary → Lead → Status). When creating new Lead default value is filled automatically.
- Priority: indicates Lead priority among other Leads (list is taken from Settings → Dictionary → Lead → Priority).
- Start: start date of Lead.
- Finish: finish date of Lead.
- Account: Lead account (list is taken from Sales → Accounts). Click
 to add new Account and fill information. Click
 to manually insert account information without creating new account in the list.
 - Contact: contact person regarding this Lead (list is taken from Sales → Contacts related to selected Account). Click to add new contact and fill information. Click to manually insert contact information without creating new contact in the list.
- Owner: indicates who will be responsible and accountable for this Lead (list is taken from Settings → Users).
- Campaign: Campaign during which Lead was generated.
- Groups: ability to assign a group to a recording being created.
- Mobile, Phone, Email, Country, City, Street address, Post code: Lead’s contact information and address.
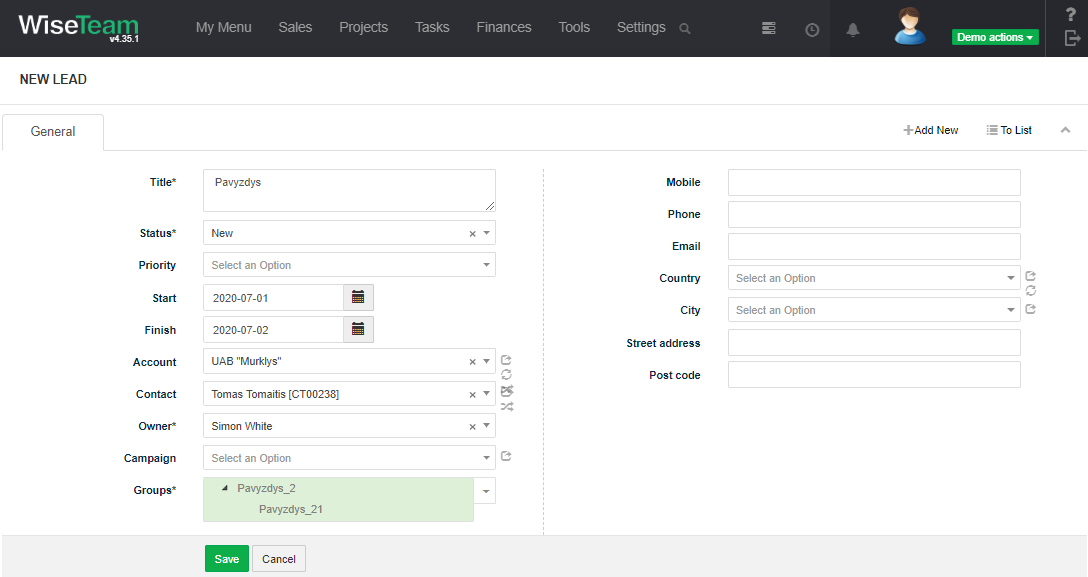
4. Click Save.
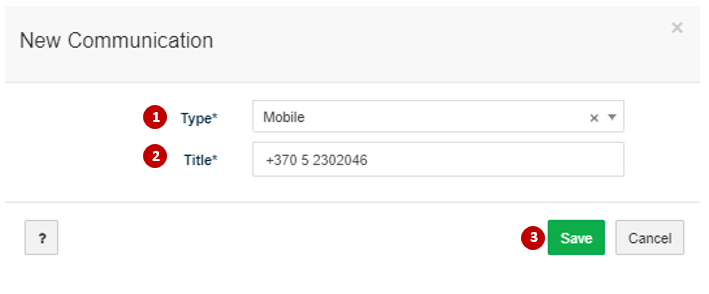
Add Lead contact information
To add additional Lead contact information follow these steps:
1. In tab Communications click ![]() .
.
2. Choose type of communication, fill in information and click Save.
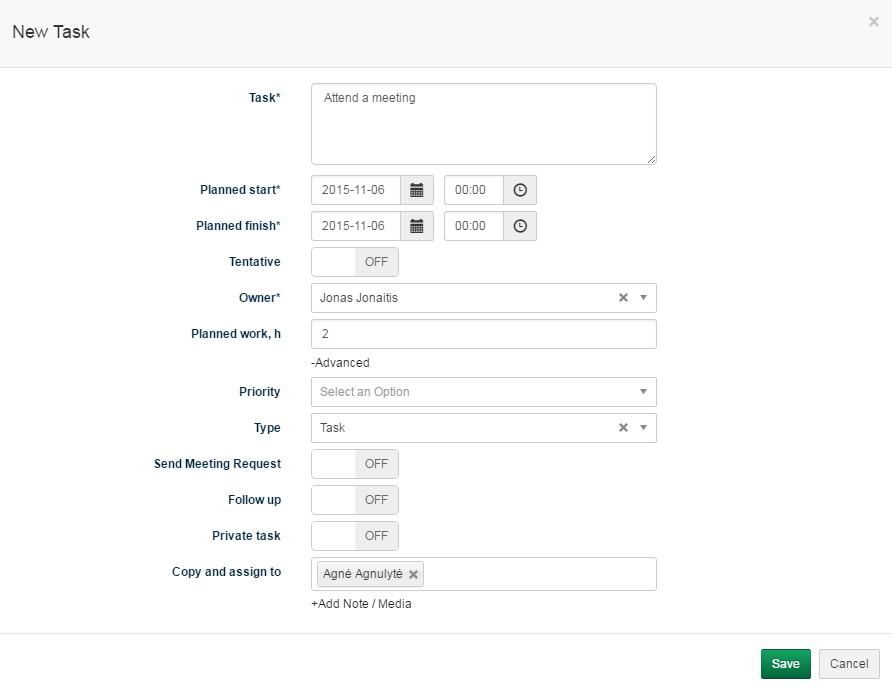
Create Task related to Lead
It is possible to create Tasks related to Lead in several locations of the system: Kanban window, Tasks list window, Lead form, Leads list window.
To create new Task related to Lead in the Lead form follow these steps:
1. In tab Tasks click ![]() .
.
2. Fill in Task’s information and click Save.
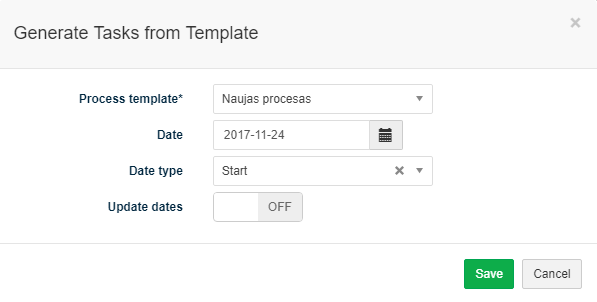
Generate a set of Tasks related to Lead (initiate Process)
It is possible to generate a set of Tasks related to Lead from a template (initiate a predefined process). To generate a set of Tasks related to Lead follow these steps:
- In tab Tasks click and select Process or in tab Process click
 .
. - Select process template from the drop-down menu (list is taken from Settings → Processes).
- Define date when process should start / finish.
- Define date type: Start – First Task of the process will start on the indicated date, Finish – dates of the process Tasks will be defined so that the process would end on the indicated date. Important: there is a possibility to define process finish date only if process does not have decision tasks.
- Active Update dates option automatically updates tasks dates when changes in process task planned dates are made.
- Click Save.
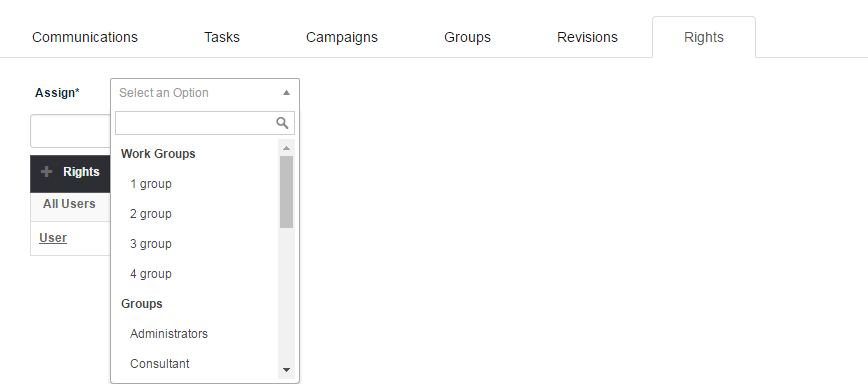
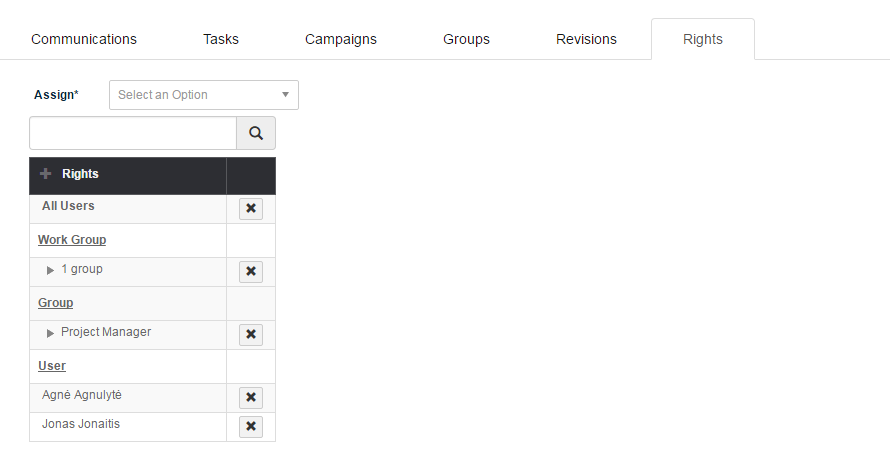
Set rights for users relevant to the Lead
To set rights for relevant to the Lead follow these steps:
1. Go to tab Rights.
2. In field Assign choose users who will see and be able to edit Lead information. It is possible to choose to show Lead to all users, to work groups, to groups or only to particular users.
Qualify Lead
In WiseTeam it is possible from Lead automatically create Opportunity. In case you do not need to create Opportunity.
To create Opportunity from lead follow these steps:
1. Click button Create Opportunity.
2. Fill in information about Opportunity that will be created. Fill in status, start and finish dates, select whether to copy, move from Lead or to leave on Lead media and notes.
3. Click Save.
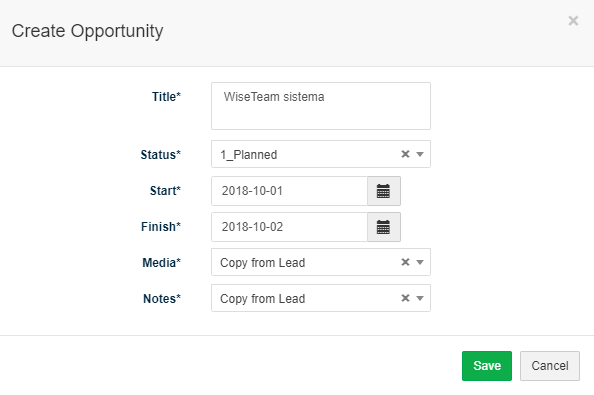
After created opportunity, lead status automatically changes to Done.
Perform actions in the list of Leads
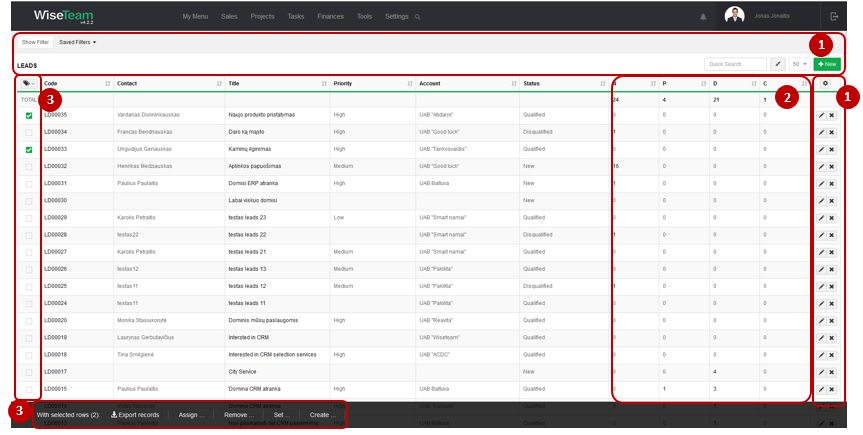
1. As in all lists, you can work with Leads by using standard functionality buttons: filter Leads, add new Lead, change table properties, search Leads, narrow or extend information viewable in table cells, edit or add additional information to the Lead, delete Lead from the list.
2. It is possible to see how many related Not Started, In Progress, Done, Cancelled or Waiting tasks Lead has.
3. It is possible to perform actions with Leads in the list without opening the entries. After selecting single or multiple Leads by marking lines ![]() or selecting all Leads by clicking
or selecting all Leads by clicking ![]() button available actions are:
button available actions are:
- Export records: is used to export selected Leads to MS Excel file.
- Assign Rights: is used to assign rights to review and edit Leads information for work groups, user groups or specific users.
- Remove Rights: is used to remove rights to review and edit Leads information from specific work groups, user groups or specific users.
- Set Priority: is used to set priority to selected Leads.
- Set Owner: is used to set new Owner to selected Leads.
- Set Groups: is used to set up a group for selected Leads.
- Create Task: is used to create new Task related to selected Leads. In case several Leads are selected several Tasks will be created.