Navigation: Projects → Projects
Project form is used to add/edit Project information and to show related information.
Review Project form
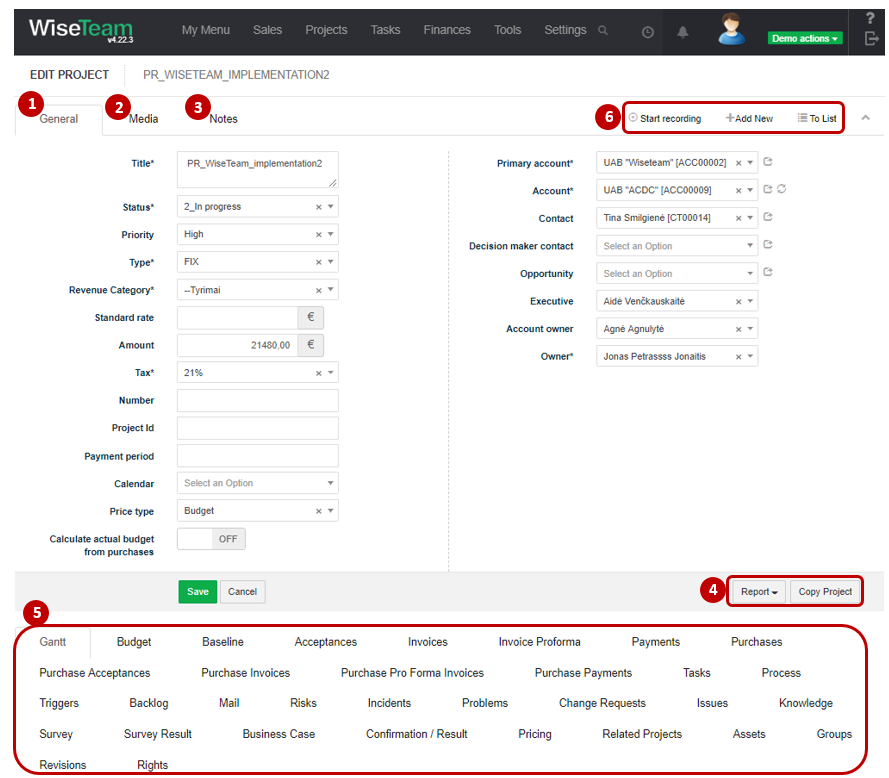
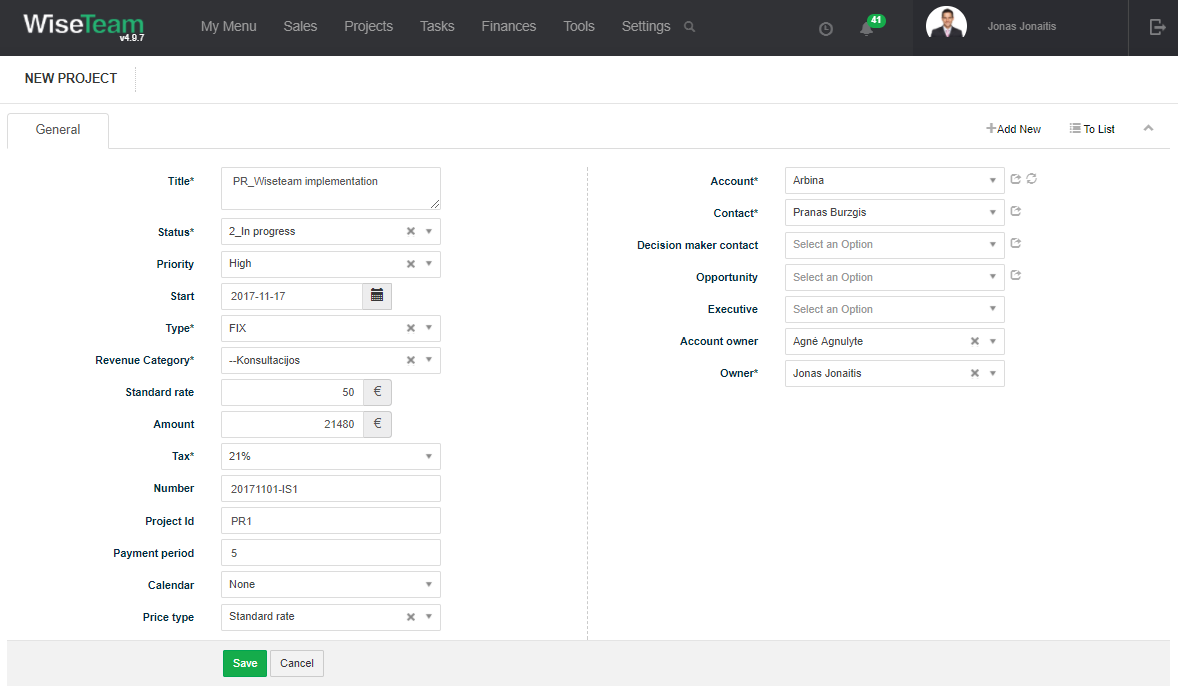
1. General information about Project is provided in tab General. You have to fill in this information when creating new Project.
2. In tab Media it is possible to attach files. Click Select Files or do Drag & Drop.
3. In tab Notes it is possible to leave notes. Click Add note to create new note.
4. Actions that can be taken with Project:
- Generate report: there is a possibility to generate A3 Report, Project Report, Task Report and Budget report (export Project budget to MS Excel) by clicking button Report.
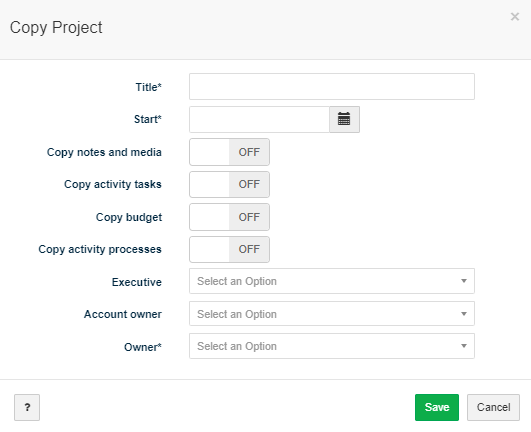
- Copy Project: allows copying Project in order to simplify the process of creating new Projects. When copying Project, you have to define title and start date of new Project and to select whether to copy notes and media. Also can to choose to copy activity tasks, activity processes and budget of project. Executive, Account owner, Owner: fields are filled out from project forms. Field values can be changed.
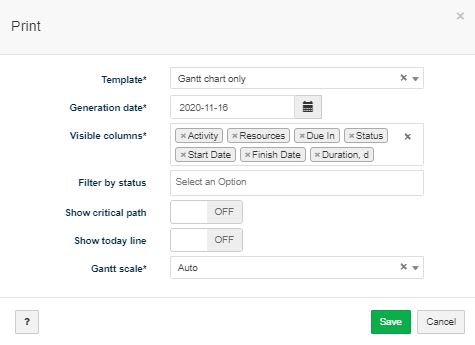
- Gantt chart only: ability to create a printout of Gantt activities and graphics. Can adjust the settings for the printout in the modal window:
– Generation date: indicate the generation date
– Visible columns: indicate fields to display
– Filter by status: indicate status of activities
– Show critical path: indicate ON if need to show critical path
– Show today line: indicate ON if need to show today line
– Gantt scale: indicate scale of Gantt (Auto, Day, Week, Month, Quarter, Year)
5. Available Info Tabs:
- Gantt: provides possibility to plan a Project by adding Project activities and milestones and defining dependencies between them, and to follow up on Project progress.
- Budget: indicates information regarding planned and actual Project budget (working hours, amount), according to each person who has worked under particular Project.
- Baseline: indicates starting point used for comparisons. After each change made in Project, information reflects here.
- Acceptances: indicate information regarding planned and issued acceptance certificates. Click
 to add new acceptance certificate and fill information.
 - Invoices: indicates Invoices related to particular Project ( list is taken from Finances → Invoices). Click to add new Invoice and fill information.
- Invoice Proforma: indicates Pro Forma Invoices related to particular Project (list is taken from Finances → Pro Forma Invoices). Click to add new Invoice proforma and fill information.
- Payments: indicates information related to payments of particular Project. Click to add new Payment and fill information.
- Purchase Budget: this tab creates a purchase budget.
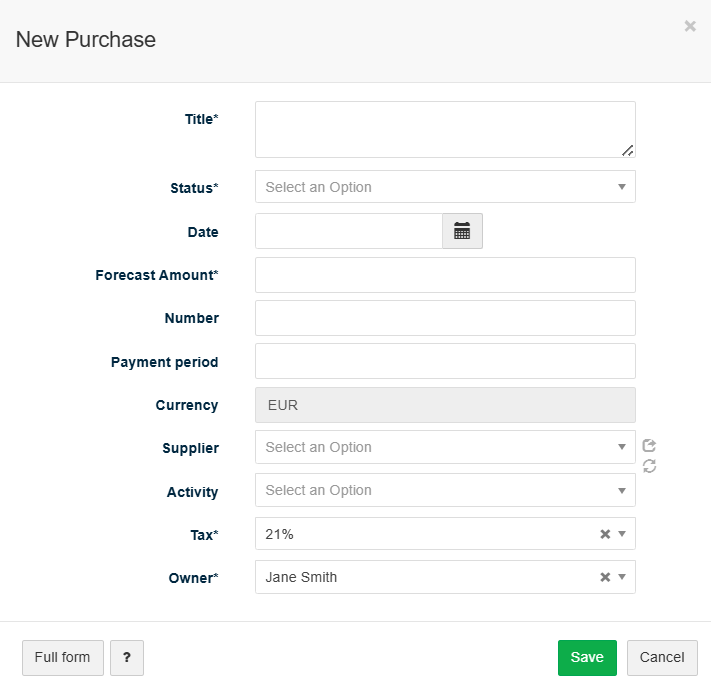
- Purchases: indicates information related to Purchase of particular Project. Click
 to add new Purchase and fill information.
 - Purchase Acceptances: indicates information related to Purchase Acceptance of particular Project. Click to add new Purchase Acceptance and fill information.
- Purchase Invoices: indicates information related to Purchase Invoice of particular Project. Click to add new Purchase Invoice and fill information.
- Purchase Pro Forma Invoices: indicates information related to Purchase Pro Forma Invoice of particular Project. Click to add new Purchase Pro Forma Invoice and fill information.
- Purchase Payments: indicates information related to Purchase Payment of particular Project. Click to add new Purchase Payment and fill information.
- Tasks: allows creating and managing tasks of various types related to the Project. Click to add new Task or
 and select Process to generate Tasks from a template.
 - Process: allows initiating processes and seeing the progress of initiated processes. If multiple processes are running, you can cancel active processes with Cancel all at the same time,
 .
. - Triggers: allows seeing and creating task process triggers related to particular Project. Click to add new Process Trigger record.
- Backlog: allows seeing and creating backlog records related to Project. Click to add new Backlog record. Click
 to add new Task. Click
  and :
and :
- select Set All Completed to change the status of all related Backlog records to Completed.
- select Assign Group to assign the group to all related Backlog records.
- select Remove Group to remove the group from all related Backlog records.
- Mail: allows seeing, creating and assigning related emails. Click create new Mail. Click
 to assign other mails.
 - Risks: indicates information related to Risks of particular Project. Click to add new Risk and fill information.
- Incidents: indicates information related to Incidents of particular Project. Click to add new Incident and fill information.
- Problems: indicates information related to Problems of particular Project. Click to add new Problem and fill information.
- Change requests: indicates information related to Change requests of particular Project. Click to add new Change request and fill information.
- Issues: indicates information related to Issues of particular Project. Click to add new Issue and fill information.
- Knowledge: indicates Knowledge bases related to particular Project. Click to add new Knowledge base and fill information.
- Survey: allows adding survey for a Project.
- Survey Results: allows adding survey and reviewing survey results for a Project.
- Business Case: allows adding reasoning for initiating a Project.
- Confirmation / Result: allows defining planned and actual Project results.
- Pricing: allows defining prices of different roles participating in the Project.
- Related Projects: allows defining related Projects.
- Assets: indicates information related to Assets of particular Project. Click to add new Assets and fill information.
- Groups: allows grouping Projects.
- Revisions: allows seeing history of actions taken with the Project.
- Rights: allows setting rights for users relevant to the Project.
- Stakeholders: ability to assign additional contacts to a project that are not related to the project company.
6. Available navigation buttons:
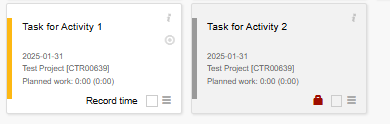
- Start recording: is used to start recording time spent working on Project.
- Add new: is used to create new Project.
- To list: is used to go to the list of Projects.
 : is used to create custom fields.
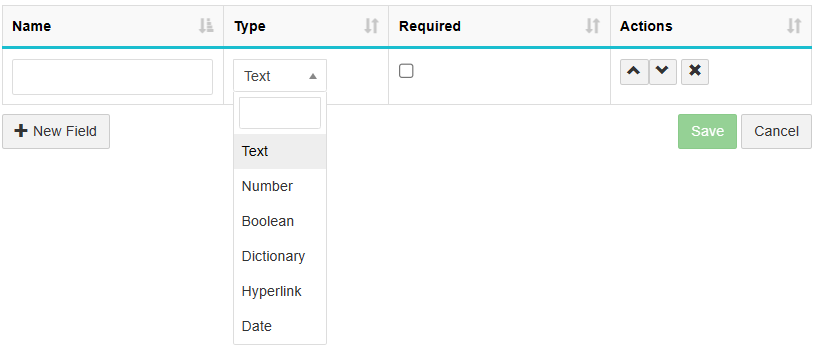
1. Press New Field to create field.
2. Fill in the field name.
3. Select field type.
4. Press Save to save field.
Create new Project
To create new Project follow these steps:
1. Go to Projects → Projects.
2. In the list of Projects click ![]() .
.
3. Fill in fields in tab General:
- Title: title of the Project.
- Status: indicates status of the Project (list is taken from Settings → Project → Status), according to the project phase.
- Priority: indicates priority of the Project (list is taken from Settings → Project → Priority).
- Start: Project start date.
- Type: fixed, time and material, fixed/time and material, not billable (list is taken from Settings → Dictionary → Project→ Type).
- Revenue category: revenue category to which particular Project should be assigned.
- Project currency: the field is filled in with the default value (from Settings → Dictionary → Currencies). Field is managed through Settings → Settings →Form fields management. User can specify any active currency from the drop list. When resources are included in project budget the default Standard rate and Cost value will depend on Project Order Currency.
- Invoice currency: the field is filled in with the default value (from Settings → Dictionary → Currencies). Field is managed through Settings → Settings → Form fields management. User can specify any active currency from the drop list.
- Standard rate: standard rate of amount billed for single hour of the Project without taxes.
- Amount: planned budget for Project excluding taxes.
- Support amount: planned support amount of project.
- Budget Buffer: the value is entered between 1 and 100 because the value is percent. Used to purchase budget for calculate project amount with reserve.
- Billable: field sets the status of the Project in terms of finance if it can be billed. Available options: Billable, Billable when done, Not Billable (list is taken from Settings → Dictionary → Project → Billable).
- Tax: tax used for Project by default.
- Number: Contract number.
- Project ID: Project number assigned to Project.
- Payment period: Payment period filled automatically according to payment period defined in Settings.
- Calendar: define which calendar have to be used when planning Activities in tab Gantt. You can choose to use a calendar without defined non working days (None) or a calendar with defined non working days (Calendar).
- Fixed dates: ON – used to recalculate project planned duration when Calendar is turned off/on and must be fixed dates. OFF – used to recalculate project planned duration when Calendar is turned off/on and should not be a fixed date.
- Price type: define which prices have to be used (standard rate, rates defined in budget or prices defined in tab Pricing) when generating Time report.
- Calculate actual budget from purchases: ON – enabled parameter indicates that project budget actuals are calculated from purchases.
- Account: Project account (list is taken from Sales → Accounts).
- Contact: contact person regarding particular Project (list is taken from Sales → Contacts related to selected Account).
- Decision maker contact: person who makes decisions (list is taken from Sales → Contacts related to selected Account).
- Opportunity: indicate Opportunity related to particular Project.
- Executive: Project Executive represents user who will directly use the output of the Project, has ultimate responsibility for the Project and has to assure that the Project remains desirable, viable and achievable at all times. Project Executive would normally come from the senior management (list is taken from Settings → Users).
- Account owner: user responsible and accountable for the Account, filled automatically with Account owner, can be changed manually.
- Owner: who will be responsible and accountable for this Project (list is taken from Settings → Users).
4.Click Save.
Plan Project activities
Tab Gantt provides a possibility to create Project plan. This is a basic workflow of planning a Project using both the Gantt chart and Kanban tools in WiseTeam:
- Add activities and milestones. Activities are used to divide Project into smaller manageable parts. Milestones are any measurable, tangible, verifiable outcomes, results, or items that must be produced to complete a project or part of a project. Project activities and milestones are visualized in Gantt chart.
- Break down the activities into smaller chunks of work. Larger activities can be split into several more manageable sub-activities (children activities). You can create a hierarchy of activities in a WBS (Work Breakdown Structure).
- Break down the activities into tasks. Tasks represent the lowest level of work to be done and are being worked on in the Kanban window.
- Follow up on project progress. In the Gantt chart Project baseline and visual Today line helps to asses whether Project activities are being carried out on time and actual Project progress complies with the approved Project plan. Also a number of widgets in the Dashboards section gives you a great insight into project progress.
Gantt chart possibilities are explained below.

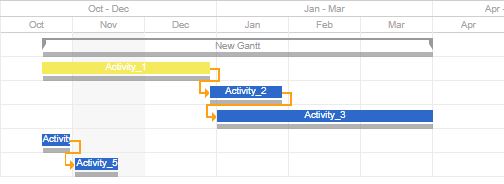
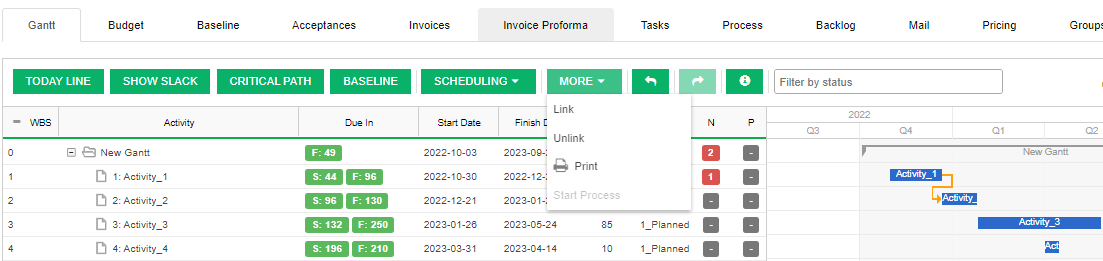
1. There are two main parts in tab Gantt: a hierarchical list of activities and a graphical time plan – Gantt chart. These parts are the main work space to create Project plan. To work with Project activities use buttons presented in column Actions:
 – used to create a task related to the specific activity.
 – used to create and edit Project activities. This button provides a drop down list with additional actions allowing to create, import and edit activities:
- New Activity – used to create new activity.
- Import Activities – used to import activities from other Project. After selecting this option and parent activity from other Project, children activities of the selected parent activity will be copied to the Project being edited.
- Start process – used to create new process from process template.
- Edit Resources – used to edit resources in the project or activity.
- Finish date reminder – use to create reminder of activity finish date.
- Add Work Resources – used to add work resources to the project. This option is available only for Project summary activity. You can also add a work resource by clicking the resource field on the number.
- Create Baseline – used to create baseline for project. this option is available only for Project summary activity.
- Edit – used to edit activity information. This selection opens a full form of the activity. You can also double click on a title of the activity or a bar in the Gantt chart to open a modal window to edit the activity.
- Delete – used to delete activity (there is no possibility to delete a Project summary activity).
- Update WBS – allows to update WBS codes of Project Activities. this option is available only for Project parents activities.
- Add Relation – used to set up dependencies (links) between activities by linking activities in the Gantt chart. This option is available in the child activity.
To create a hierarchy of activities in a WBS (Work Breakdown Structure) follow these steps:
- Click button and select New Activity (Project summary activity is created automatically).
- Fill in Activity information and click Save. Activities that starts and ends at the same date (duration is 0) are considered as milestones and the symbol in the Gantt chart is changed to
 .
. - Create all necessary parent activities and children activities by repeating 1-2 steps. It is possible to change activity’s position in the activity hierarchy by using drag and drop functionality. You can also change dates and duration of activities in the Gantt chart by dragging bars in the chart and by dragging start or end borders of the bars.
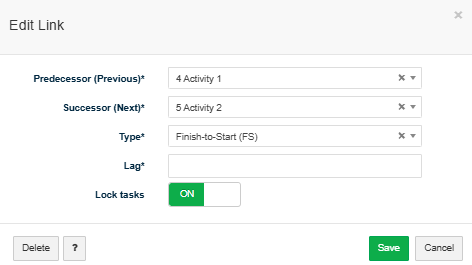
- Set up dependencies (links) between activities by linking activities in the Gantt chart. Hove over on the start or finish of the activity in the Gantt chart, click on the circle at the end of the activity and drag it to the related activity
 . Finish-to-Start (FS) dependency will be created.
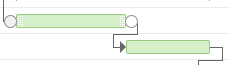
 - To change the type of the dependency between activities click on the dependency (link) in the Gantt chart or Gantt hierarchy in the Predecessors/Successors field.
 Select one of the four available dependency (link) types (Finish-to-Start (FS), Start-to-Start (SS), Finish-to-Finish (FF), Start-to-Finish (Sf)). Also can change previous and next activity. Need to select activity in the previous or next field in the drop list.
- If necessary, define lag time – a delay between two tasks that are linked by a dependency. For example, if there must be a two-day delay between the finish of one task and the start of another, you can establish a finish-to-start dependency and specify two days of lag time for the successor task.

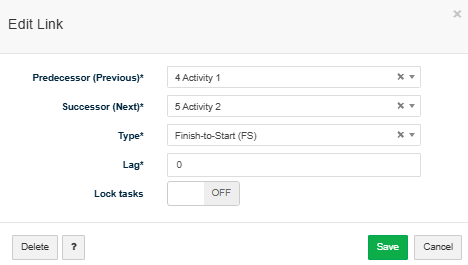
- Dependency (link) can also have Lock Tasks set on. This setting defines whether the connected activity tasks should be locked/unlocked. For example, if second activity tasks can be worked on only after the first activity tasks are done, then setting Lock Tasks on dependency (link) will lock second activity tasks. In such case, second activity tasks would unlock only after first activity tasks status is done.
- Set up dependencies between all activities.
2. It is possible to change time period showed on Gantt chart by clicking buttons ![]() according to the length of the project and granularity of the plan.
according to the length of the project and granularity of the plan.
3. It is possible to review Project baseline dates in the Gantt chart by clicking button ![]() .
.
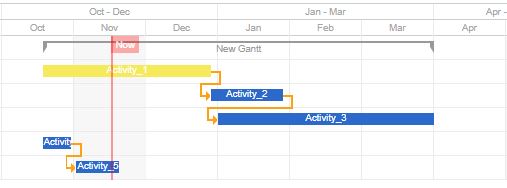
4. Button ![]() visualizes today’s date.
visualizes today’s date.
5. By clicking button ![]() you can see which activities are in the critical path. The critical path consists of the longest sequence of activities from project start to end that should be started and completed exactly as scheduled to ensure the project is completed by a certain date in the future.
you can see which activities are in the critical path. The critical path consists of the longest sequence of activities from project start to end that should be started and completed exactly as scheduled to ensure the project is completed by a certain date in the future.

6. Button ![]() → Print allows to review a printable version of Project plan.
→ Print allows to review a printable version of Project plan.

7. Colors of bars are explained under ![]() button. Colors changes according to Activity status. Activity status colors are defines in Dictionary (Settings → Dictionary → Activity → Status).
button. Colors changes according to Activity status. Activity status colors are defines in Dictionary (Settings → Dictionary → Activity → Status).
8. It is possible to change scheduling type of the activity by selecting the activity and clicking button ![]() . You can schedule activities manually or automatically. By using manually scheduled activities, you can manually schedule the duration and the start and finish dates for the activity and place it anywhere in your schedule. Manually scheduled activity will not be affected, if other activities are changed. By using automatically scheduled activities, based on your input, such as task duration, planned start date, relations between activities, Wiseteam calculates the start and finish dates for activities. If anything about your Project changes after you create your schedule, you can change specific activities or change start and finish dates of the summary activity and Wiseteam will automatically update your schedule depending on the relations between activities and their duration.
. You can schedule activities manually or automatically. By using manually scheduled activities, you can manually schedule the duration and the start and finish dates for the activity and place it anywhere in your schedule. Manually scheduled activity will not be affected, if other activities are changed. By using automatically scheduled activities, based on your input, such as task duration, planned start date, relations between activities, Wiseteam calculates the start and finish dates for activities. If anything about your Project changes after you create your schedule, you can change specific activities or change start and finish dates of the summary activity and Wiseteam will automatically update your schedule depending on the relations between activities and their duration.

9. Filter by Status field allows to filter Activities according to Activity status.
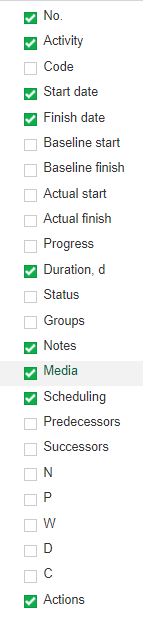
10. Button ![]() allows to add additional information to the Gantt view or hide unused information.
allows to add additional information to the Gantt view or hide unused information.
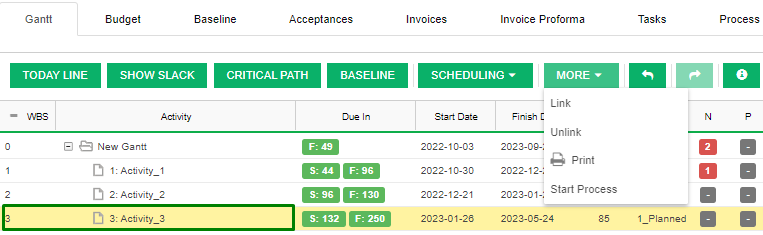
11. ![]() → Link/Unlink. It is possible to link or unlink to marked activities. The link between the activities able to see in the Gantt chart (Predecessors and Successors fields).
→ Link/Unlink. It is possible to link or unlink to marked activities. The link between the activities able to see in the Gantt chart (Predecessors and Successors fields).
12. ![]() It is possible to see in the graphic how much time a task can be delayed before a subsequent task, or the entire project itself, is also delayed.
It is possible to see in the graphic how much time a task can be delayed before a subsequent task, or the entire project itself, is also delayed.

13. ![]() → Start Process. It is possible to start process for selected activitities.
→ Start Process. It is possible to start process for selected activitities.
14. ![]() Undo/Redo. It is possible to undo or redo actions in the Gantt, till save or go to the next tab or object.
Undo/Redo. It is possible to undo or redo actions in the Gantt, till save or go to the next tab or object.
Add Project budget
Project budget can be formed of expenses related to T&M projects, work allocated to project resources (employees) and material resources.
Project Budget possibilities are explained below.
1. The Project budget possible to import all budget from another project and activity. Click ![]() Import all budget and fill a fields:
Import all budget and fill a fields:
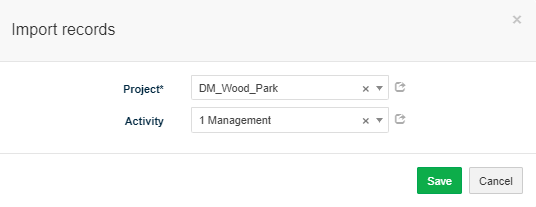
Click Save.
2.To add new or import Expenses in Project budget follow these steps:
- To add new planned expense click in section Expenses and fill in expense information:
- Title: indicate what the particular T&M Expense is.
- Status: indicate status of the T&M Expense (list is taken from Settings → Expense → Status).
- Type: indicate type of the T&M Expense (list is taken from Settings → Expense → Type).
- Planned amount: indicate planned value of the T&M Expense without taxes.
- Activity: indicate related Activity during which T&M Expense will occur.
- Tax: tax rate for the T&M Expense.
- Supplier: indicates supplier (list is taken from Sales→ Accounts) of the T&M Expense.
- To import T&M expenses from other Project click and select Import and define Project and Activity from which budget will be imported.
3. To assign new or import Work Resources in Project budget follow these steps:
- To allocate work (working hours) to resources click in section Work Resources and fill in information:
- Activity: Activity that requires the work of particular resource.
- Role: role assigned to particular resources. When role is selected, resources that are assigned to that role will be filterred out in the field Resourse and fields Standard rate and Cost will be filled automatically.
- Quantity: work quantity allocated to the resource.
- Resource: resource assigned to the Project.
- Standard rate: standard rate of amount billed for single hour of the Project without taxes. If pricing information according to different roles is added in tab Pricing, standard rate from this tab will be filled automatically after selecting role. If there is no pricing information in tab Pricing, standard rate defined in resources form will be filled automatically after selecting a resource.
- Cost: amount that resource costs for single hour for the company.
- Comment: additional comment about resource assigned to Project.
- To import Work Resources from other Project click and select Import and define Project and Activity from which budget will be imported.
- To generate Work Resources from Tasks click and select Generate from Tasks. There is a possibility to generate budget using planned or contracted work defined in Task’s form. Budget will be generated according to the value selecting in Settings → Settings → General settings → tab Projects → field Task work for project budget. After generating budget from Tasks, it can be regenerated, if Tasks information has changed. In this case existing budget will be deleted and new budget generated.
- To create new Work Resource. Click in section and select Create Resource.
4. To assign new or import Material Resources in Project budget follow these steps:
- To allocate material resources click in section Material Resources and fill in information:
- Activity: Activity that requires the work of particular resource.
- Quantity: work quantity allocated to the resource.
- Resource: resource assigned to the Project.
- Standard rate: standard rate of amount billed for single hour of the Project without taxes, standard rate defined in resources form will be filled automatically after selecting a resource.
- Actual standard rate: actual standard rate of amount billed for single hour of the Project without taxes.
- Cost: amount that resource costs for single hour for the company.
- Actual cost: actual amount that resource costs for single hour for the company.
- Comment: additional comment about resource assigned to Project.
- To import Material Resources from other Project click and select Import and define Project and Activity from which budget will be imported.
- To create new Material Resource. Click in section and select Create Resource.
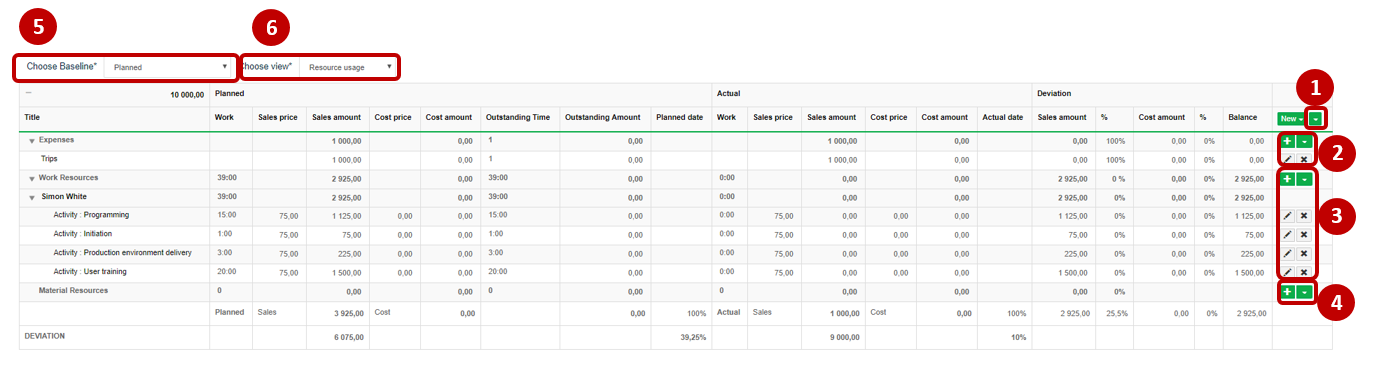
5. It is possible to change project baseline and compare different baseline budget information with actual project budget information.
6. It is possible to change project budget view. You can see project budget in Resource Usage view or Activity Usage view. By selecting Resource Usage view you will see project budget information grouped by Expenses, Work and Material resources, by selecting Activity Usage view you will see project budget information grouped by Activities.
After indicating all expenses you can see whether total sum do not exceeds planned Project budget defined in field Amount. When Project is in progress deviation between actual and planned amounts is shown. Red color of the deviation value indicates that actual amount exceeds planned amount. This allows you to track and control Project budget.
Save and submit Project baseline for approval
When activities and budget of the Project are planned, starting point of the Project (baseline) have to be saved and submitted for approval. To create and submit baseline for approval follow these steps:
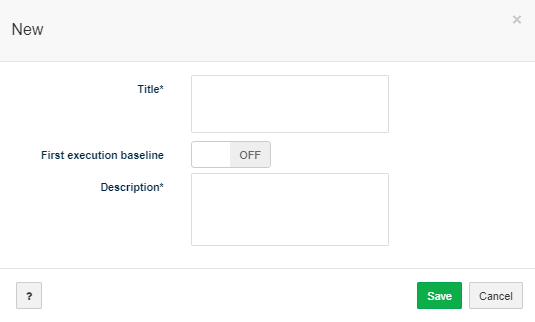
1. In tab Baseline click ![]() .
.
2. Fill in title and description of the Baseline. When starting to execute Project and generating baseline for the first time turn ON First execution baseline. This will allow you to evaluate Project according to first approved baseline by using Project Portfolio dashboard (column First Due in).
3. Click Save.
Create Task related to Project
It is possible to create Tasks related to Project in several locations of the system: Kanban window, Tasks list window, Project form, Projects list window.
To create new Task related to Project in the Project form follow these steps:
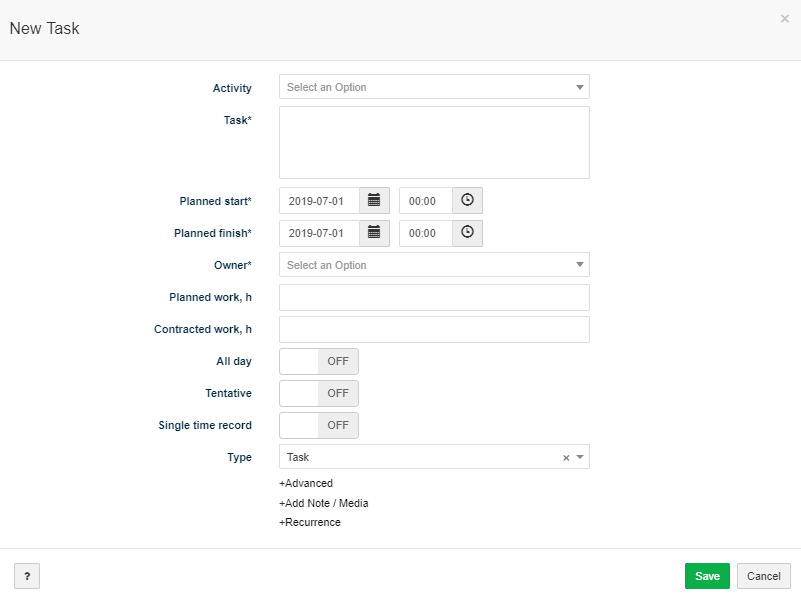
1. In tab Tasks click ![]() .
.
2. Fill in Task’s information and click Save.
Generate a set of Tasks related to Project (initiate Process)
It is possible to generate a set of Tasks related to Project from a template (initiate a predefined process). To generate a set of Tasks related to Project follow these steps:
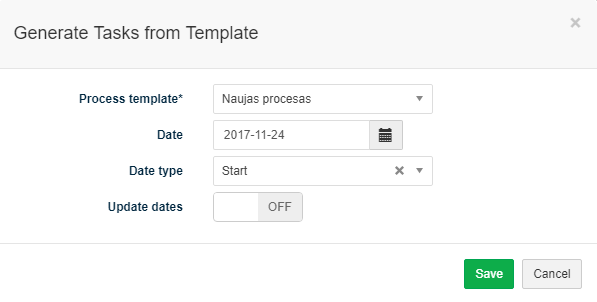
- In tab Tasks click and select Process or in tab Process click
 .
. - Select process template from the drop-down menu (list is taken from Settings → Processes).
- Define date when process should start / finish.
- Define date type: Start – First Task of the process will start on the indicated date, Finish – dates of the process Tasks will be defined so that the process would end on the indicated date. Important: there is a possibility to define process finish date only if process does not have decision tasks.
- Active Update dates option automatically updates tasks dates when changes in process task planned dates are made.
- Click Save.
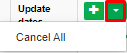
In tab Process it is possible to review the progress of initiated processes and number of Not Started, In Progress, Waiting, Done and Cancelled Tasks. There is also a possibility to cancel a process in this tab. After canceling a process, all not started, waiting and in progress tasks will be canceled.

Create Purchase Budget
To create new Purchase budget follow these steps:
1. Click ![]() .
.
2. Fill information:
3. click Save.
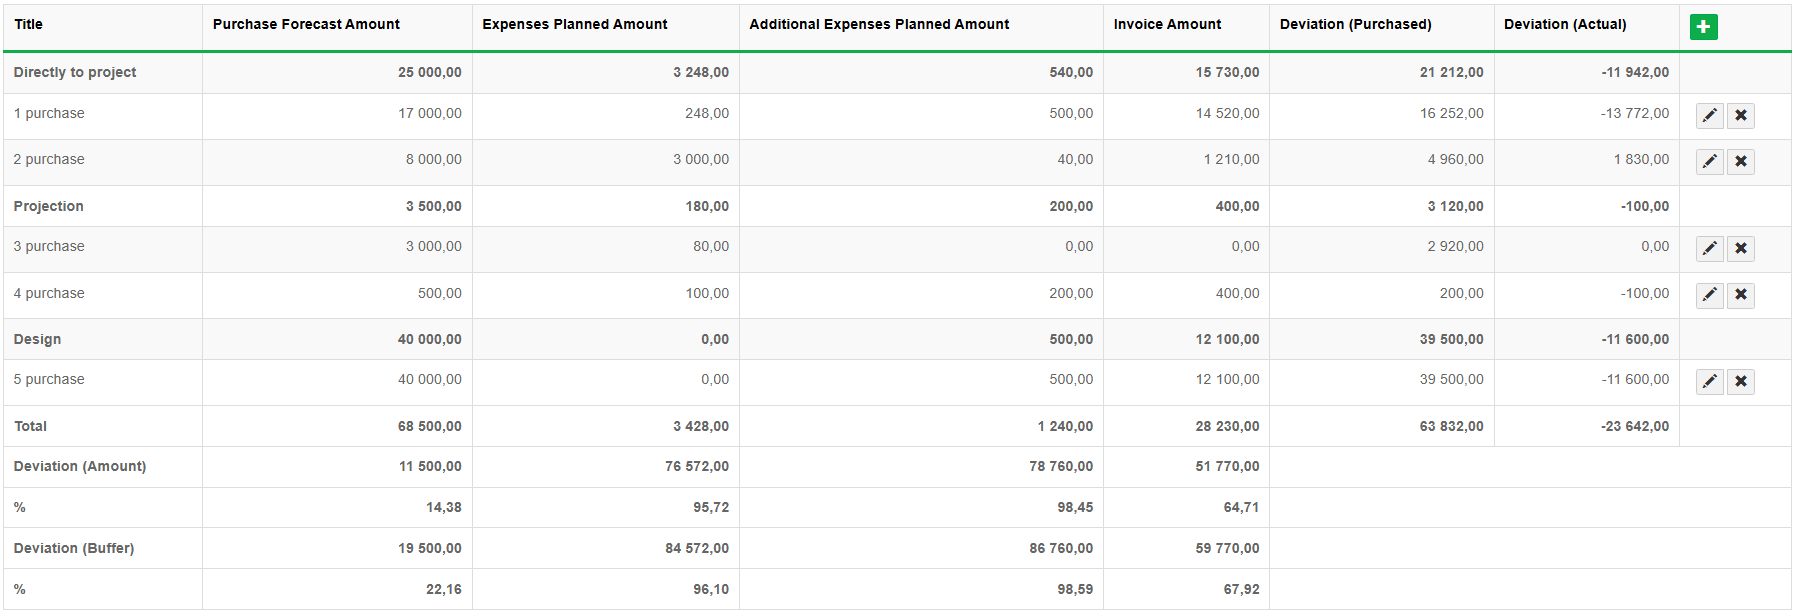
Purchase Forecast Amount: value from purchase form field Forecast Amount.
Expenses Planned Amount: value from expense form field Planned amount and if parameter Additional expenses is OFF.
Additional Expenses Planned Amount: value from expense form field Planned amount and if parameter Additional expenses is ON.
Invoice amount: value from purchase invoice.
Deviation (Purchased): “Forecast amount” – “Expenses Planned Amount” – “Additional Expenses Planned Amount”
Deviation (Actual): “Expenses Planned Amount” + “Additional Expenses Planned Amount” – “Invoice Amount”
Deviation (Amount): Project “Amount” – column “Total”
Deviation (Buffer): Project amount with reserve – column “Total”. Project amount with reserve = Project Amount + (Project Amount * Budget buffer(%)).
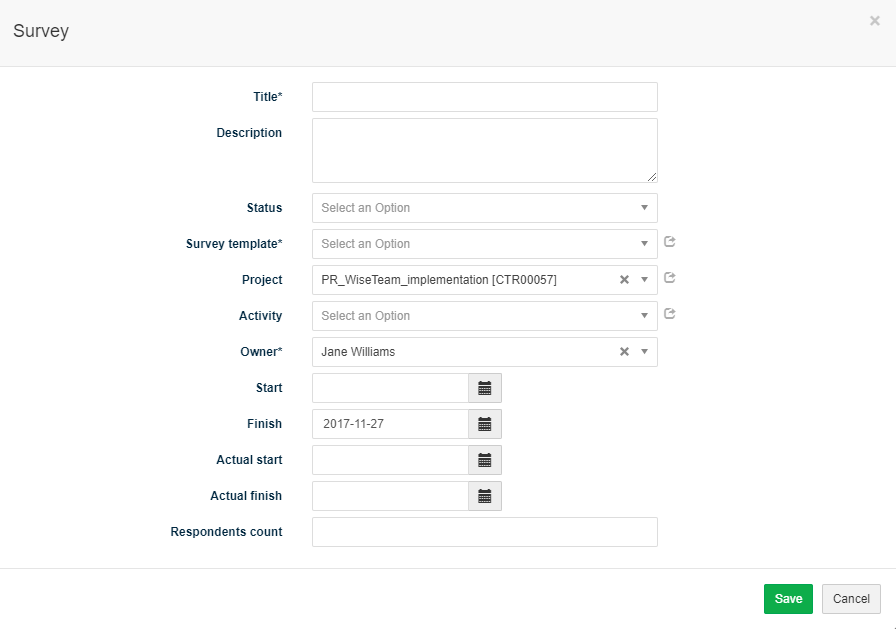
Create Survey related to project
To create new Survey related to Project follow these steps:
1. In the Survey click ![]() .
.
2. Fill in Survey information:
- Title: title of the Survey.
- Description: description of the Survey.
- Status: indicates status of the Survey (list is taken from Settings → Dictionary → Project → Status).
- Survey template: Select survey template from the drop-down menu (list is taken from Settings → Settings → Survey Templates).
- Project: indicate Project related to the Survey.
- Activity: indicate Activity related to the Survey.
- Owner: indicate who is responsible for this Survey (list is taken from Settings → Users).
- Start: indicate planned start of the Survey.
- Finish: indicate planned finish of the Survey.
- Actual start: indicate actual start of the Survey.
- Actual finish: indicate planned finish of the Survey.
- Respondents count: indicate the number of respondents for the Survey.
3. Click Save.
Fill in Survey Results related to project
To create new Survey related to Project follow these steps:
1. In the Survey click ![]() .
.
2. Fill in Survey information:
- Title: title of the Survey.
- Description: description of the Survey.
- Status: indicates status of the Survey (list is taken from Settings → Dictionary → Project → Status).
- Survey template: Select survey template from the drop-down menu (list is taken from Settings → Settings → Survey Templates).
- Project: indicate Project related to the Survey.
- Activity: indicate Activity related to the Survey.
- Owner: indicate who is responsible for this Survey (list is taken from Settings → Users).
- Start: indicate planned start of the Survey.
- Finish: indicate planned finish of the Survey.
- Actual start: indicate actual start of the Survey.
- Actual finish: indicate planned finish of the Survey.
- Respondents count: indicate the number of respondents for the Survey.
3. Click Save.
If you already have created a survey, you can select survey, click ![]() and fill in survey results according to selected survey template:
and fill in survey results according to selected survey template:

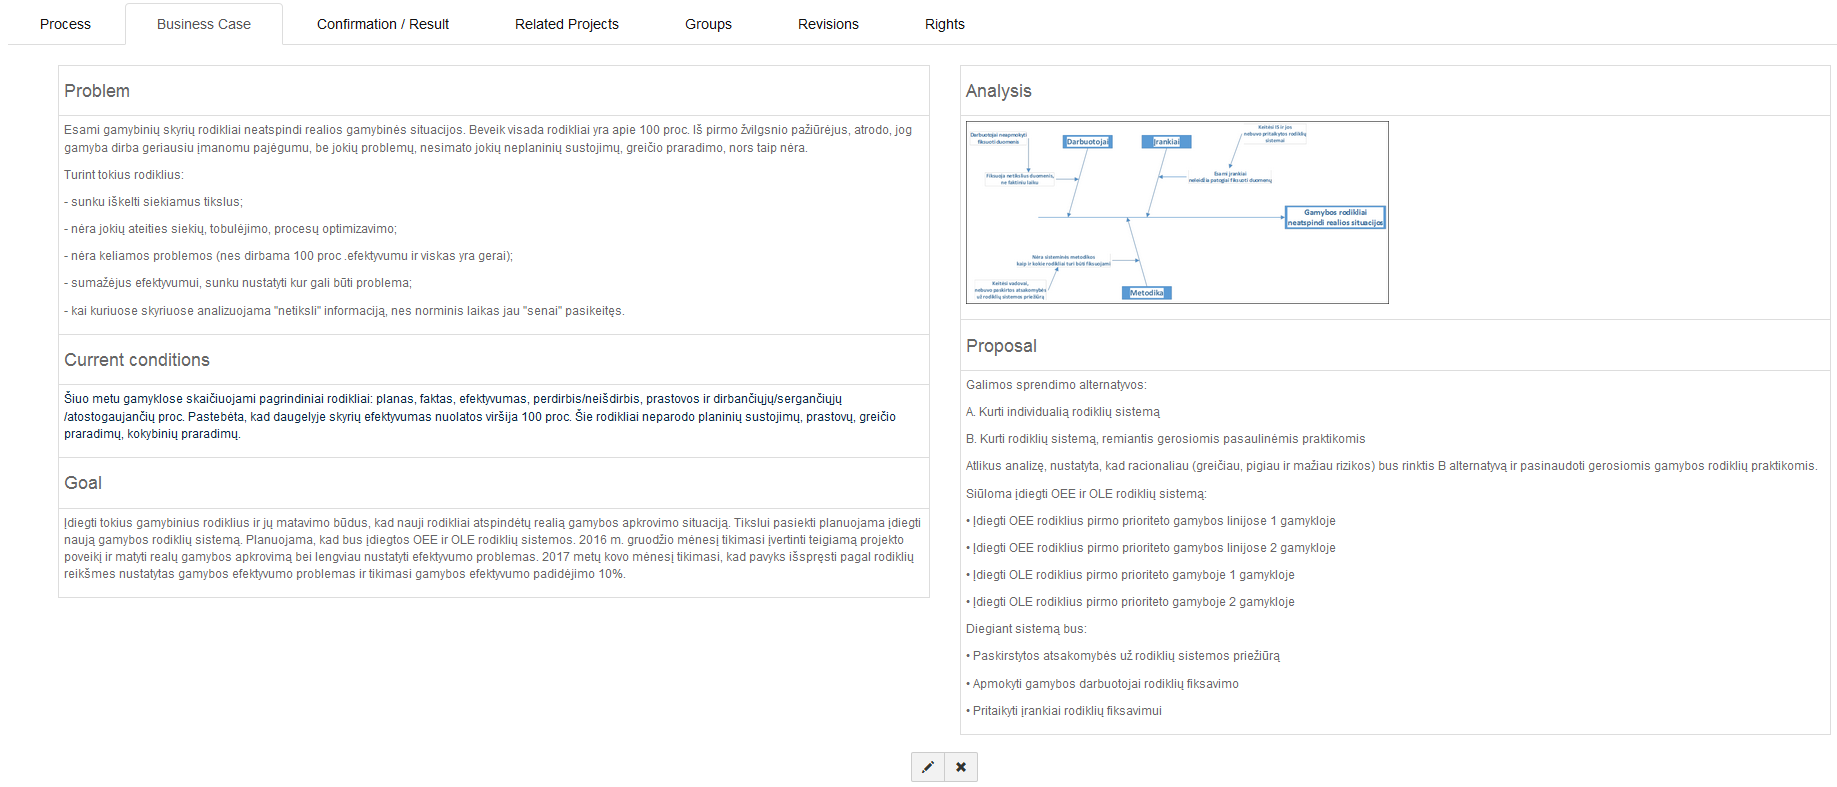
Add Business Case information
Tab Business Case is used to capture the reasoning for initiating a Project. There is a possibility to define problem, current conditions, Project goal, problem analysis and proposal how to solve defined problem and achieve Project goal.
To add Business Case information follow these steps:
1. In the Business Case click ![]() .
.
2. Fill in Business Case information:
- Problem: describe what problem you are trying to solve with a Project being initiated.
- Current Conditions: describe current conditions to make the problem clear.
- Goal: define the goal of the Project. State in measurable or identifiable terms.
- Analysis: describe root causes of the problem.
- Proposal: describe your proposed countermeasures for a problem.
Note: it is possible to add textual information and format it, add pictures, tables, links, etc. in every field.
3. Click Save.
This information will be included in A3 Report.
Define Project results
Tab Confirmation / Result is used to define planned and actual Project results:
- Output: any specific product that the Project has to deliver, whether tangible or intangible. Outputs are commonly delivered after the Project’s closure.
- Outcome: is the result of the change derived from using the Project’s outputs. Outcomes typically start to be achieved after the handover of the Project’s outputs to users.
- Benefit: improvement resulting from an outcome. Benefits generally start to be achieved after the outcomes.
To add Project results follow these steps:
1. In the Confirmation / Result tab click ![]() .
.
2. Fill in information of new result (minimum required information is type and title):
- Type: select type of the result (output. outcome or benefit).
- Title: title of the result.
- UOM: unit of measurement.
- Expected value: expected value of the result.
- Tolerance: describe your proposed countermeasures for a problem.
- Evaluation date: date when defined result should be evaluated.
- Actual value: actual value of the result.
3. Click Save.

This information will be included in A3 Report.
Define prices of roles participating in a Project
To define a price of a role participating in a Project follow these steps:
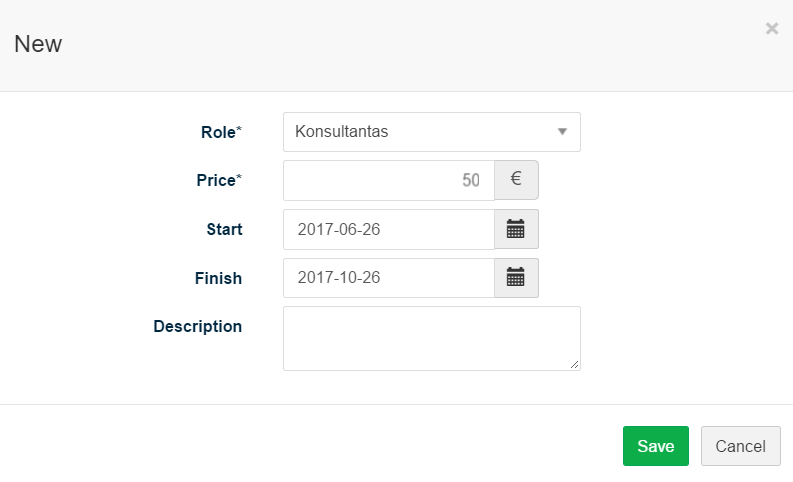
1. In tab Pricing click ![]() .
.
2. Select role, define price, start and finish dates, add description and click Save.
These prices will be assigned to Resources added to Project budget according to their roles. If prices are not specified in tab Pricing, standard rates defined in Resources form will be used.
Define related Projects
To define a relation with other Projects follow these steps:
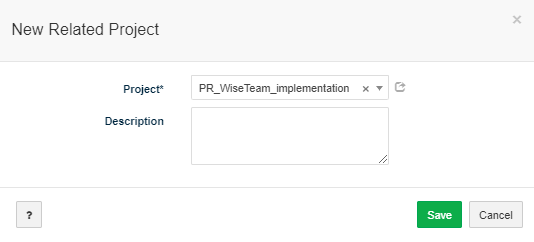
1. In tab Related Projects click ![]() .
.
2. Select a related Project, describe how Projects are related and click Save.
Set rights for users relevant to the Project
To set rights for relevant to the Project follow these steps:
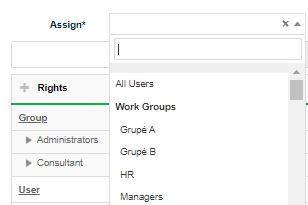
1. Go to tab Rights.
2. In field Assign choose work groups, user groups or specific users that will see and be able to edit Project information.
Generate A3 Report
A3 is a one-page report that can be used for documenting the necessary information of the Project for decision making and progress reporting. A3 Report includes:
- Problem, Current Conditions, Goal, Analysis, Proposal: a description of the problem you are trying to solve with a Project being initiated, current situation, project goal, analysis performed to determine root causes of the problem and proposed solutions for the problem taken from tab Business Case.
- Plan: related Tasks, their completion status, due dates, responsibilities, and notes. This section of the report provides Project progress information.Tasks are included in the report according to the parameters defined before generating the report (report time period, choice of whether to include late Tasks).
- Results: the list of planned Project outputs, outcomes and benefits taken from tab Confirmation / Result.
- Experience: lessons learned taken from tab Knowledge.
To generate A3 Report follow these steps:
1. In Project form click button Report and select A3 Report.
2. Indicate start and finish dates, choose whether to include task owners, late tasks and click Save.
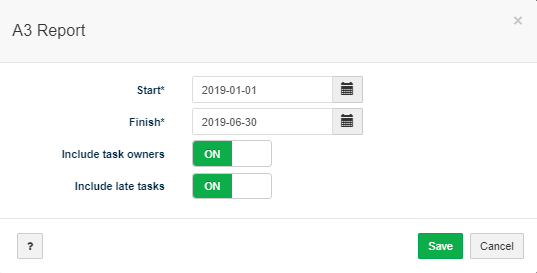
3. Save the generated PDF file.
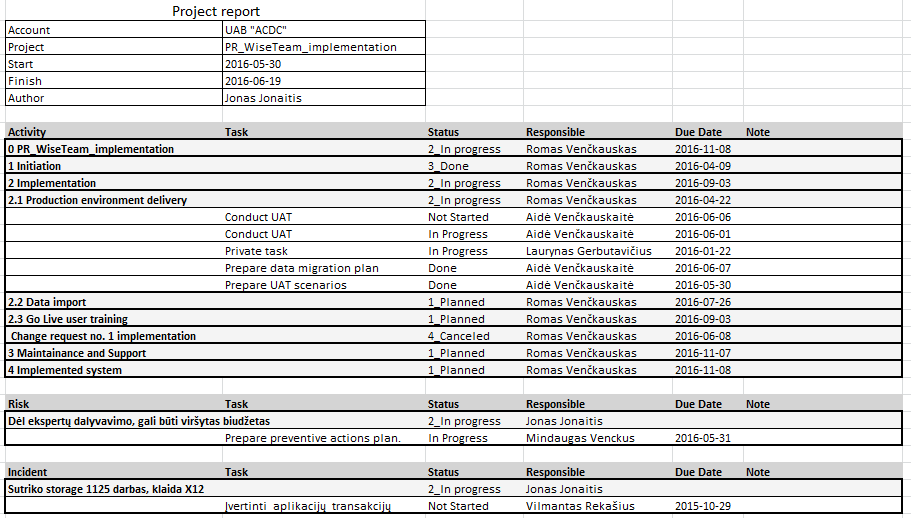
Generate Project Report
Project report covers all activities, risks, incidents, problems, change requests, issues and related Tasks of the Project with their statuses, due dates and notes. To generate Project Report follow these steps:
1. In Project form click button Generate and select Project Report.
2. Indicate start and finish dates, choose whether to include task owners, late tasks and click Save.
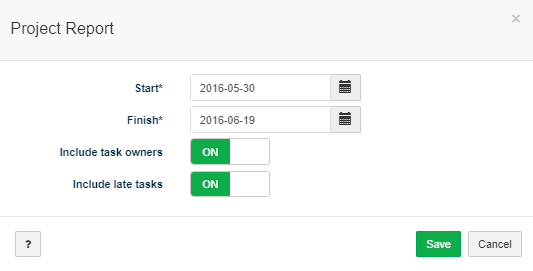
3. Save the generated MS Excel file.
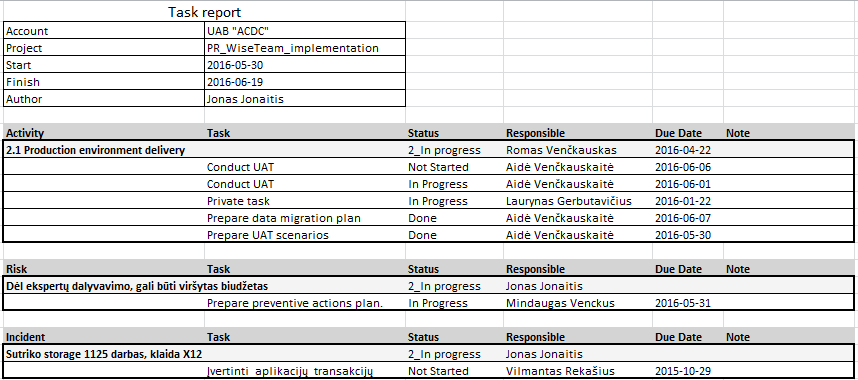
Generate Task Report
Task Report covers all related Tasks with their statuses, due dates and notes. To generate Task Report follow these steps:
1. In Project form click button Generate and select Task Report.
2. Indicate start and finish dates, choose whether to include task owners, late tasks and click Save.
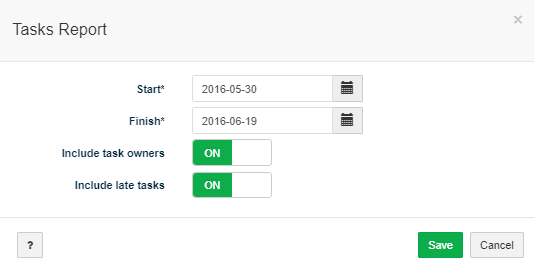
3. Save the generated MS Excel file.
Perform actions in the list of Projects
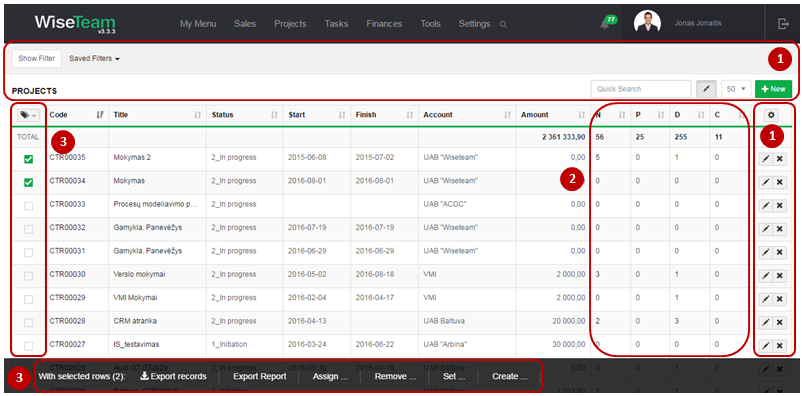
1. As in all lists, you can work with Projects by using standard functionality buttons: filter Projects, add new Project, change table properties, search Projects, narrow or extend information visible in table cells, edit or add additional information to the Project, delete Project from the list (Project can be deleted together with related Activities, Tasks, Time records and Project’s Resources if Project baseline was not submitted).
2. It is possible to see how many related Not Started, In Progress, Waiting, Done or Cancelled tasks Project has.
3. It is possible to perform actions with Projects in the list without opening the entries. After selecting single or multiple Projects by marking lines ![]() or selecting all Projects by clicking button
or selecting all Projects by clicking button ![]() available actions are:
available actions are:
- Export records: is used to export selected Projects to MS Excel file.
- Export Report: is used to export Projects Report to MS Excel file.
- Assign Rights: is used to assign rights to review and edit Project information for works groups, user groups or specific users.
- Remove Rights: is used to remove rights to review and edit Project information from specific works groups, user groups or specific users.
- Set Status: is used to set status of the Project.
- Set Priority: is used to set priority of the Project.
- Set Price type: is used to set price type of the Project.
- Set Owner: is used to assign new Owner to selected Projects.
- Set Groups: is used to set up a group for selected Projects.
- Set Type: is used to set type of the Project.
- Create Acceptance Certificate: is used to create new Acceptance Certificates for selected Projects. In case several Projects are selected several Acceptance Certificates will be created. There is a possibility to choose option to generate Acceptance Certificate Lines (lines will be generated from bottom level billable Activities) and to generate Time Reports.
- Create Activities: is used to import activities from other Project. After selecting Project and parent activity, children activities of the selected parent activity will be copied to the selected Projects. There is a possibility to define prefix that will be added to the imported activities, define start date of the activities, choose whether to keep status values, copy notes and media, automatically update dates.
- Create Periodic Activities: is used to create periodic Activities. If Project has Activities with parameter Periodic turned ON, subactivities with same title and indicated prefix will be created after selecting this action.
- Create Task: is used to create new Task related to selected Projects. In case several Projects are selected several Tasks will be created.
- Create Budget: is used to generate budget from related Tasks.
- Create Time report: is used to generate Time reports for selected Projects.