Navigation: Sales → Accounts
An Account is a legal entity (organization). With exception single person can represent company if situation requires.
Review Account form
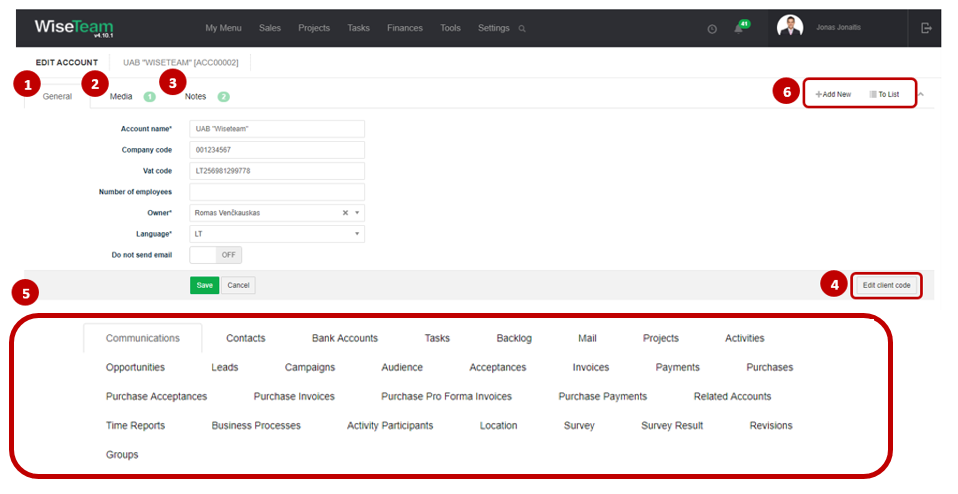
1. General information about Account is provided in tab General. You have to fill in this information when creating new Account.
2. In tab Media it is possible to attach files. Press Select Files or do Drag & Drop.
3. In tab Notes it is possible to leave notes. Press Add note to create new note.
4. Actions that can be taken with Accounts:
- Edit client code: allows editing client’s code manually. There is a possibility to update already exsisting Projects’ and Activities’ codes.
- Action: Update Project Account owner, this function available with role (role_account_action).
5. Available Info Tabs:
- Communications: allows assigning Account contact information. Click
 to add new communication and fill information.
 - Contacts: indicates individuals to contact with. Click Assign to assign existent Contact to Account or to add new Contact.
- Bank Accounts: indicates bank accounts of the organization. Click to add new Bank account and fill information.
- Tasks: indicates all tasks related to particular Account.
- Backlog: allows seeing and creating backlog records related to Project. Click to add new Backlog record. Click
 to add new Task. Click
  and :
and :
- select Set All Completed to change the status of all related Backlog records to Completed.
- select Assign Group to assign the group to all related Backlog records.
- select Remove Group to remove the group from all related Backlog records.
- Mail: allows seeing, creating and assigning related emails. Click
 to create new email. Click
  to assign email.
 - Projects: indicates all Projects related to particular Account. Click to add new Project and fill information.
- Activities: indicates all Activities related to particular Account. Click to add new Activity and fill information.
- Opportunities: indicates all related Opportunities to particular Account. Click to add new Opportunity and fill information.
- Leads: indicates all related Leads to particular Account. Click to add new Lead and fill information.
- Campaigns: indicates all related Campaigns to particular Account. Click to assign Account to Campaign and fill information.
- Audience: indicates information from the Campaign -> Audience Tab. Information about which campaign has been added account or contact of account.
- Acceptances: indicates information related to planned and actual acceptance certificates. Click to add new Acceptance Certificate and fill information.
- Invoices: indicates ability to issue invoice for particular Account. Click to add new invoice and fill information.
- Payments: indicates information related to payments of particular Account. Click to add new payment and fill information.
- Purchases: indicates information related to Purchase of particular Account. Click to add new purchase and fill information.
- Purchase Acceptances: indicates information related to Purchase Acceptance of particular Account. Click to add new purchase acceptance and fill information.
- Purchase Invoices: indicates information related to Purchase Invoice of particular Account. Click to add new purchase invoice and fill information.
- Purchase Pro Forma Invoices: indicates information related to Purchase Pro Forma Invoice of particular Account. Click to add new purchase pro forma invoice and fill information.
- Purchase Payments: indicates information related to Purchase Payment of particular Account. Click to add purchase payment and fill information.
- Related Accounts: indicated all related Accounts. Click Assign to assign existent Account or to create new related Account.
- Time Reports: indicates information related to spent time working with Account. Click to add new time report and fill information.
- Business Processes: indicates business processes of the organization. Click to add new Business Process and fill information.
- Activity participants: indicates activities and participants that participated in a particular activity, duration and price of the activity. This functionality is designed for training companies.
- Location: indicates a list of competitor’s locations / rooms. This functionality is designed for training companies.
- Survey: indicates all related Surveys to particular Account.
- Survey Results:indicates all related Survey Results to particular Account.
- Revisions: allows seeing the history of actions taken with the Opportunity.
- Groups: allows grouping Accounts according to types determined (list is taken from Settings → Groups).
6. Available navigation buttons:
- Add new: is used to create new Account.
- To list: is used to go to the list of Accounts.
 : is used to create custom fields.
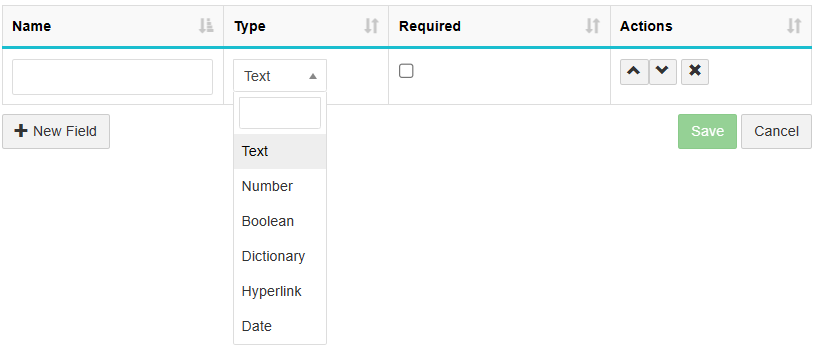
1. Press New Field to create field.
2. Fill in the field name.
3. Select field type.
4. Press Save to save field.
Create new Account
To create new Account follow these steps:
1. Go to Sales → Accounts.
2. In the list of Accounts click ![]() .
.
3. Fill in fields in tab General:
- Account name: indicates name of the Account.
- Acronym of account: acronym of the Account name.
- Client code: indicates code of the Account. Field’s value is generated automatically by combining Acronym of account and code of the country indicated in field Country or can be filled manually. This code will be added to Projects’ and Activities’ codes.
- Company code: indicates company code.
- VAT code: indicates VAT code of the Account.
- Number of employees: indicates number of employees of the Account.
- Owner: indicates who will be responsible and accountable for this Account, filled automatically (list is taken from Settings → Users).
- Language: indicates language that will be used to generate invoices and pro forma invoices.
- Project currency: the field is filled in with the default value (from Settings → Dictionary → Currencies). Field is managed through Settings → Settings → Form fields management. User can specify any active currency from the drop list.
- Invoice currency: the field is filled in with the default value (from Settings → Dictionary → Currencies). Field is managed through Settings → Settings → Form fields management. User can specify any active currency from the drop list.
- Status: select an option: active or inactive. Inactive record will not be shown in related forms.
- Incorporation date: Account date of registration.
- Mobile, Phone, Email: indicates contact information of the Account.
- Country, City, Street address, Post code: indicates address of the Account.
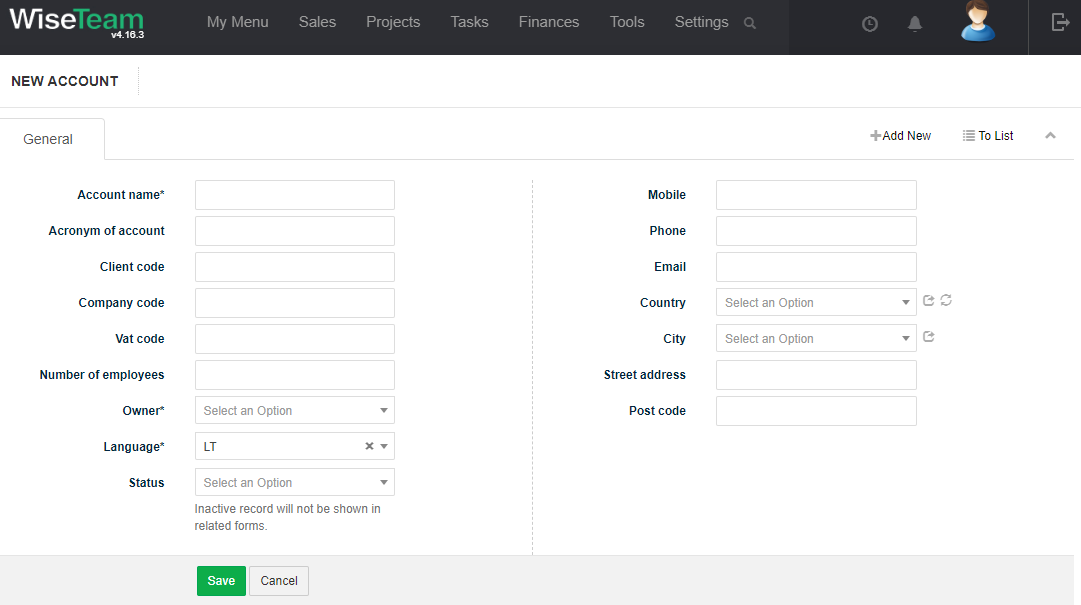
5. Click Save.
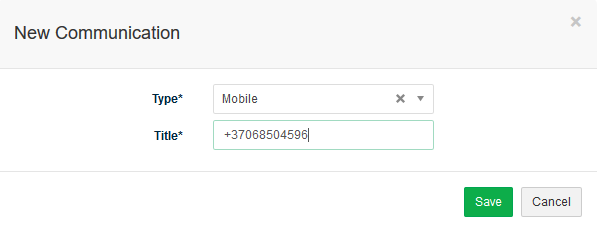
Add Account contact information
To add Account contact information follow these steps:
1. In tab Communications click ![]() .
.
2. Choose type of communication, fill in information and click Save.
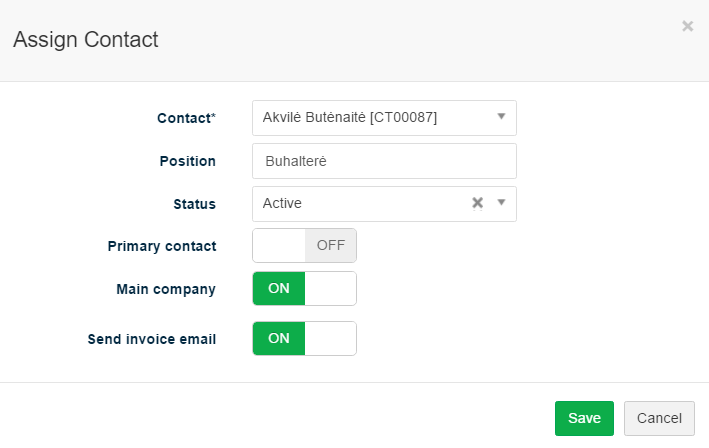
Assign Contact to Account
To assign individual to Account follow these steps:
1. In tab Contacts click ![]() and select Assign.
and select Assign.
2. Fill in information about Contact and Account relation:
- Contacts: conduct search of a related Contact.
- Position: Contacts’ position in a company.
- Status: Contact’s status in a company.
- Primary contact: turn ON, if Contact is primary contact person of the Account.
- Main company: turn ON, if Account is main Contact’s company.
- Send invoice email: turn ON, if Invoices have to be sent to this Contact.
3. Click Save.
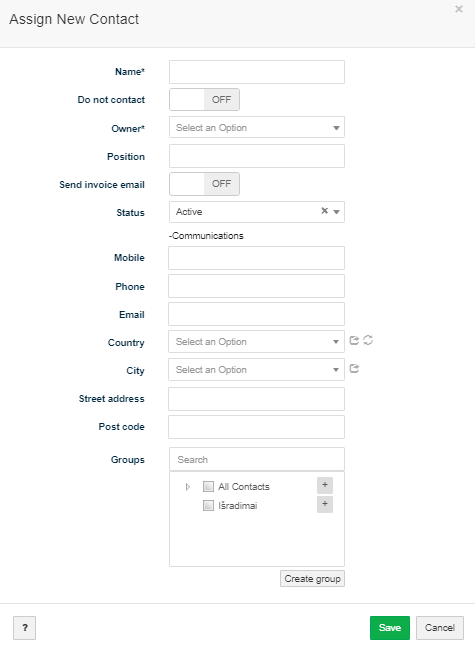
If Contact was not found while conducting Contact’s search, follow these steps to assign new Contact to Account:
1. In tab Contacts click ![]() .
.
2. Fill in Contact information:
- Name: Name and Surname of the Contact.
- Owner: user responsible and accountable for the Contact. By default user who is creating the record is indicated.
- Position: Contacts’ position in a company.
- Primary contact: turn ON if Contact is primary contact person of the Account.
- Main company: turn ON if Account is main Contact’s company.
- Status: Contact’s status in a company.
- Communications: Contact’s mobile phone, phone, email, address information.
3. Click Save.
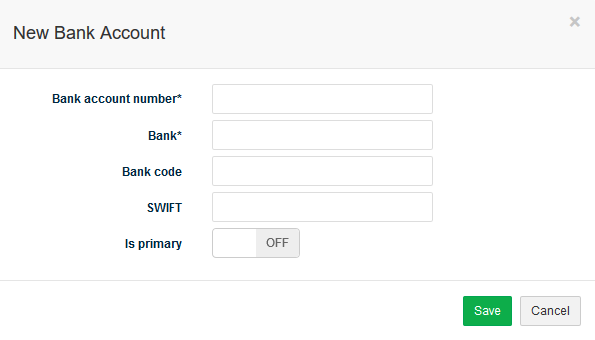
Add bank account
To add bank account follow these steps:
1. In tab Bank Accounts click .
2. Fill in bank account information:
- Bank account number: number of bank account.
- Bank name: name of the bank.
- Is primary: turn On if Bank account is primary Account’s Bank account.
3. Click Save.
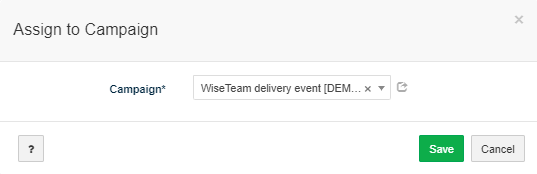
Assign Account to Campaign related to sales
It is possible to assign Account to Campaign related to sales in several locations of the system: Campaign form, Account form, Accounts list window.
To assign Account to Campaign in the Account form follow these steps:
1. In tab Campaigns click ![]() .
.
2. Choose Campaign from the list and click Save.
Assign related Account
To assign related Account follow these steps:
1. In tab Related Accounts click ![]() .
.
2. Fill in information about related Account:
- Account: conduct search of a related Account.
- Description: describe relation between particular Accounts.
3. Click Save.

Add Business Process
To add Business Process follow these steps:
1. In tab Business Processes click ![]() .
.
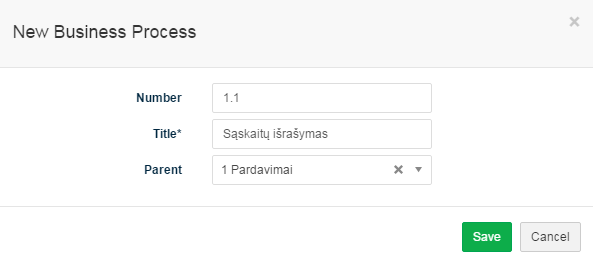
2. Fill in business process information:
- Number: number of business process.
- Title: name of the business process.
- Parent: indicates parent business process.
3. Click Save.
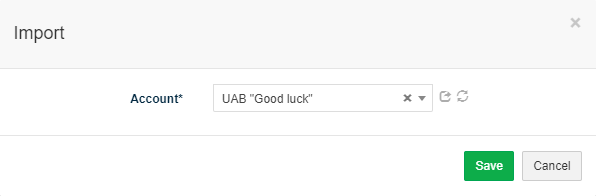
4. In tab Business Processes click ![]() to import busines process of other account.
to import busines process of other account.
Perform actions in the list of Accounts
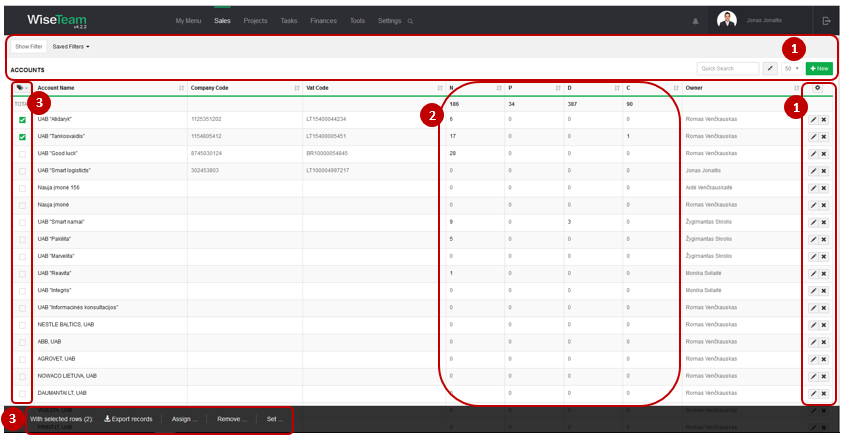
1. As in all lists, you can work with Accounts by using standard functionality buttons: filter Accounts, add new Account, change table properties, search Accounts, narrow or extend information viewable in table cells, edit or add additional information to the Account, delete Account from the list.
2. It is possible to see how many related Not Started, In Progress, Waiting, Done or Cancelled tasks Account has.
3. It is possible to perform actions with Accounts in the list without opening the entries. After selecting single or multiple Accounts by marking lines ![]() or selecting all Accounts by clicking button
or selecting all Accounts by clicking button ![]() available actions are:
available actions are:
- Export records: is used to export selected Accounts to MS Excel file.
- Assign Campaign: is used to assign selected Accounts to a Campaign.
- Remove Campaign: is used to remove selected Accounts from Campaign.
- Set Owner: is used to assign new Owner to selected Accounts.
- Set Groups: is used to set up a group for selected Accounts.
- Set Status: is used to assign to status active or inactive.