Navigation: Tools → Risks
A risk is defined as any event that is likely to adversely affect the project’s ability to achieve the defined objectives. Service provider is not able to influence this event, only take preventive actions.
Review Risk form
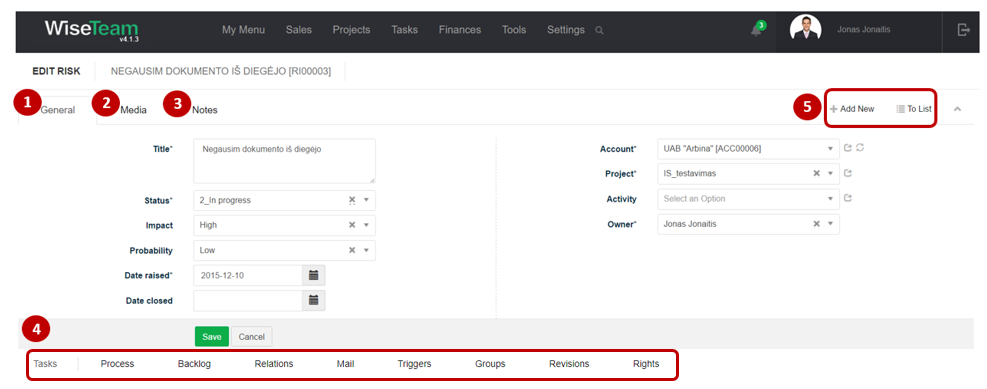
1. General information about Risk is provided in tab General. You have to fill in this information when creating new Risk.
2. In tab Media it is possible to attach files. Click Select Files or do Drag & Drop.
3. In tab Notes it is possible to leave notes. Click Add note to create new note.
4. Available Info Tabs:
- Tasks: allows creating and managing tasks of various types related to the Risk. Click
 to add new Task or
  to generate Tasks from a template.
 - Process: allows initiating processes and seeing the progress of initiated processes. Click
 to generate Tasks from a template. If multiple processes are running, you can cancel active processes with Cancel all at the same time,
 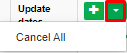 .
. - Backlog: allows seeing and creating backlog records related to Particular Risk. Click to add new Backlog record. Click
 to add new Task. Click
  and :
and :
- select Set All Completed to change the status of all related Backlog records to Completed.
- select Assign Group to assign the group to all related Backlog records.
- select Remove Group to remove the group from all related Backlog records.
- Relations: allows seeing entities related to Particular Risk.
- Mail: allows seeing, creating and assigning related emails. Click
 to create new email. Click
  to assign email.
 - Triggers: allows seeing and creating task process triggers related to particular Risk. Click to add new Process Trigger record.
- Groups: allows grouping Risks according to types determined (list is taken from Settings → Groups).
- Revisions: allows seeing the history of actions taken with the Risk.
- Rights: allows setting rights for users relevant to the Risk.
5. Available navigation buttons:
- Add new: is used to create new Risk.
- To list: is used to go to the list of Risks.
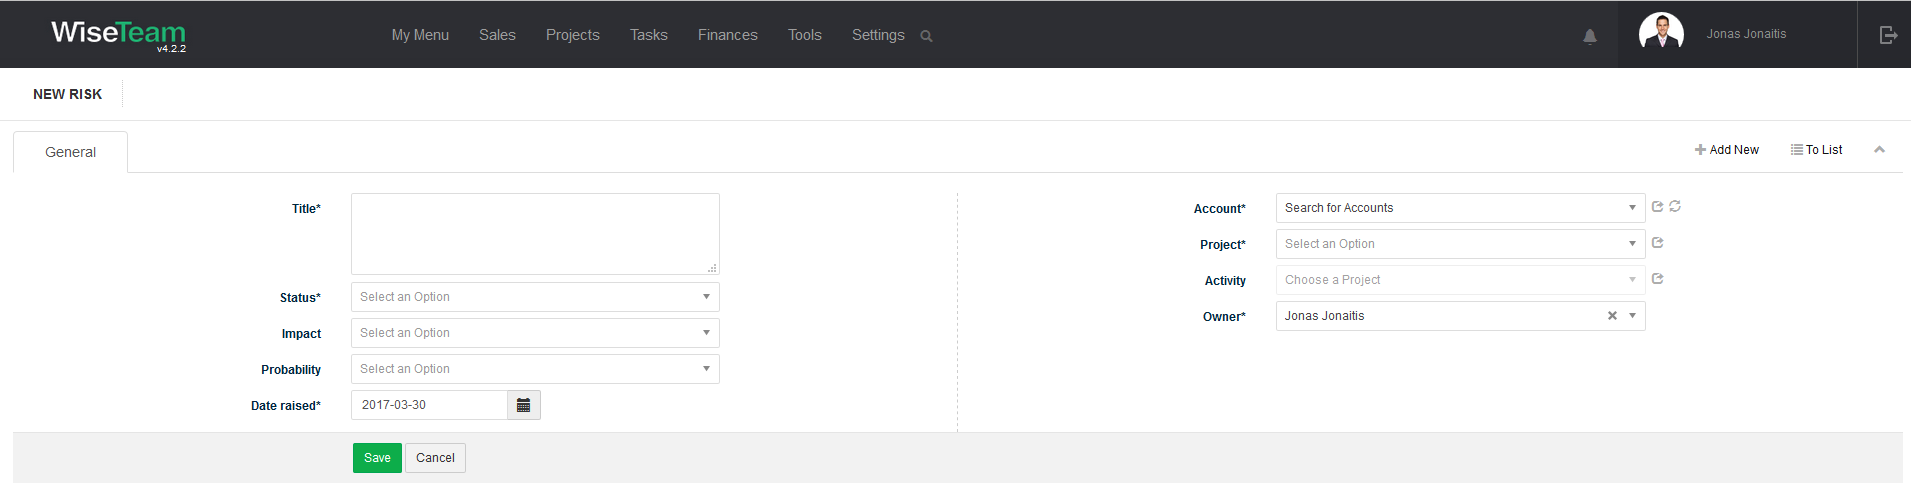
Create new Risk
To create new Risk follow these steps:
1. Go to Tools → Risks or go to tab Risks in the form of the related object (Project, Activity) and click ![]() .
.
2. Fill in fields in tab General:
- Title: shortly indicates about the risk raised.
- Status: indicates the progress of activities related to the risk.
- Impact: indicates the impact of the risk in case it occurs.
- Probability: indicates the chances of the risk to occur.
- Date raised: indicates date when particular risk is raised.
- Account: indicated to what Account risk is related.
- Project: indicates to what Project risk is related. Only active Projects are available.
- Activity: indicates to what Activity risk is related. Only active Activities are available.
- Owner: indicates who is responsible for the risk and related activities.
3. Click Save.
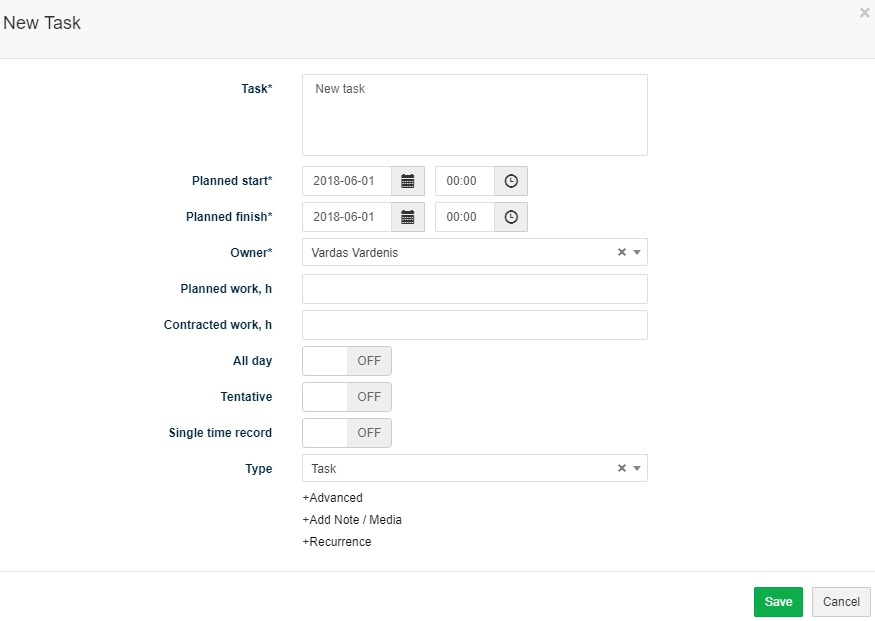
Create Task related to Risk
It is possible to create Tasks related to Risk in several locations of the system: Kanban window, Tasks list window, Risk form, Risks list window.
To create new Task related to Risk in the Risk form follow these steps:
1. In tab Tasks click ![]() and select Task.
and select Task.
2. Fill in Task’s information and click Save.
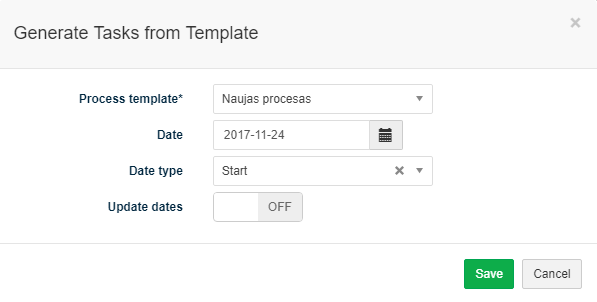
Generate a set of Tasks related to Risk (initiate Process)
It is possible to generate a set of Tasks related to Risk from a template (initiate a predefined process). To generate a set of Tasks related to Risk follow these steps:
- In tab Tasks click and select Process or in tab Process click .
- Select process template from the drop-down menu (list is taken from Settings → Processes).
- Define date when process should start / finish.
- Define date type: Start – First Task of the process will start on the indicated date, Finish – dates of the process Tasks will be defined so that the process would end on the indicated date. Important: there is a possibility to define process finish date only if process does not have decision tasks.
- Active Update dates option automatically updates tasks dates when changes in process task planned dates are made.
- Click Save.
In tab Process it is possible to review the progress of initiated processes and number of Not Started, In Progress, Waiting, Done and Cancelled Tasks. There is also a possibility to cancel a process in this tab. After canceling a process, all not started and in progress tasks will be canceled.
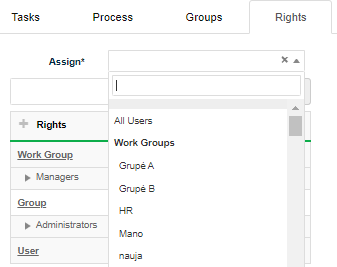
Set rights for users relevant to the Risk
To set rights for relevant to the Risk follow these steps:
1. Go to tab Rights.
2. In field Assign User choose users who will see and be able to edit Risk information. It is possible to choose to show Risk to all users or only to particular users.
Perform actions in the list of Risks
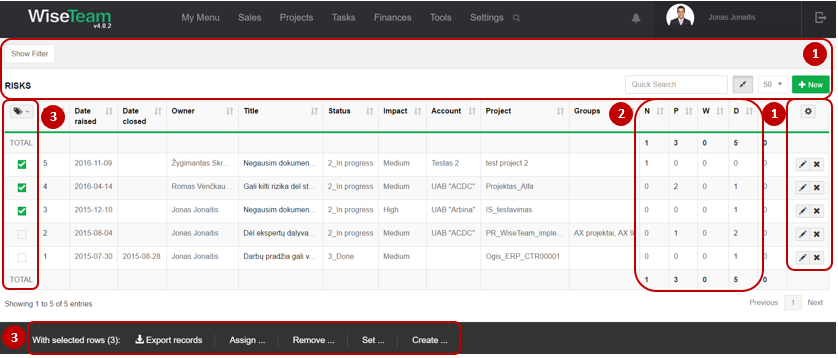
1. As in all lists, you can work with Risks by using standard functionality buttons: filter Risks, add new Risk, change table properties, search Risks, narrow or extend information viewable in table cells, copy Risk, edit or add additional information to the Risk, delete Risk from the list.
2. It is possible to see how many related Not Started, In Progress, Waiting, Done or Cancelled tasks Risk has.
3. It is possible to perform actions with Risks in the list without opening the entries. After selecting single or multiple Risks by marking lines ![]() or selecting all Risks by clicking
or selecting all Risks by clicking ![]() button available actions are:
button available actions are:
- Export records: is used to export selected Risks to MS Excel file.
- Assign to Rights: is used to assign a Rights to selected Risks.
- Remove rights: is used to remove Rights selected Risks.
- Set Status: is used to set status of the selected Risks.
- Set Impact: is used to set impact of the selected risks in case it occurs.
- Set Owner: is used to assign new Owner to selected Risk.
- Set Groups: used to assign a group to selected Risks.
- Create Task: is used to create new Task related to selected Risks. In case several Risks are selected several Tasks will be created.