Navigation: Settings → User Settings
This section allows to change user personal settings.
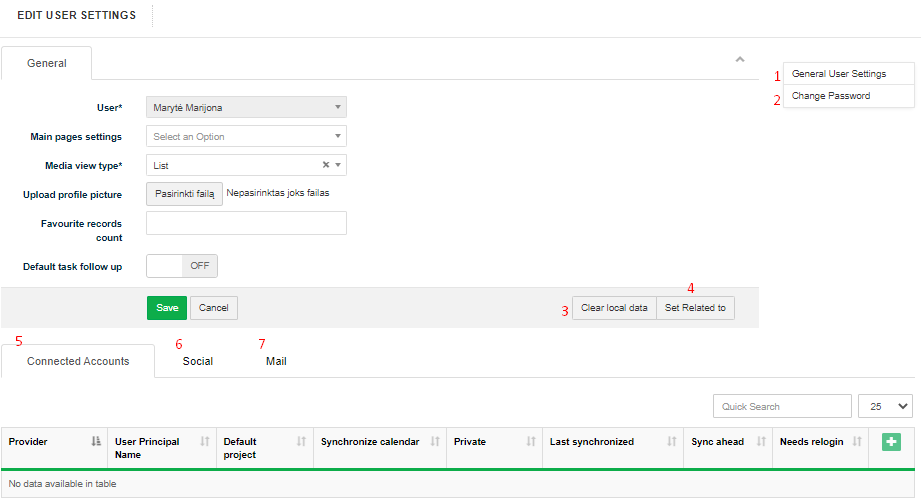
1. General User Settings allows selecting main page that will be opened after logging into WiseTeam and after clicking on WiseTeam logo, defining how media files have to be shown in the forms (available options: list and icons), to changing profile picture. Favorite records count: the number indicates how many objects to display in the Kanban unfolding button (to the right of the new task add button). Objects are the most frequently used objects by the user to create tasks in the last month. If parameter is not set, 5 objects are displayed.
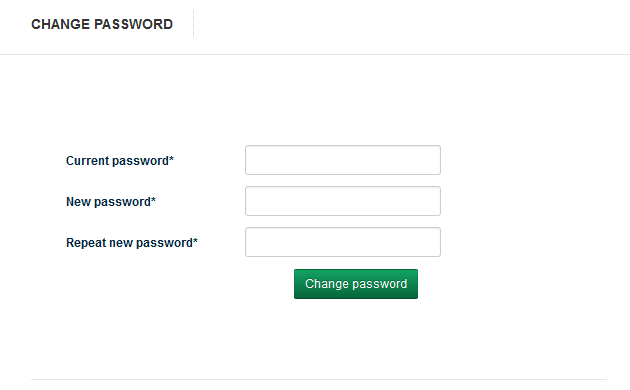
2. Change password: option allows system User to change his Login password. Requires to provide current password, chosen new password and verification by repeating the new password.
3. Clear local data: button used for clearing User’s browser’s local storage.
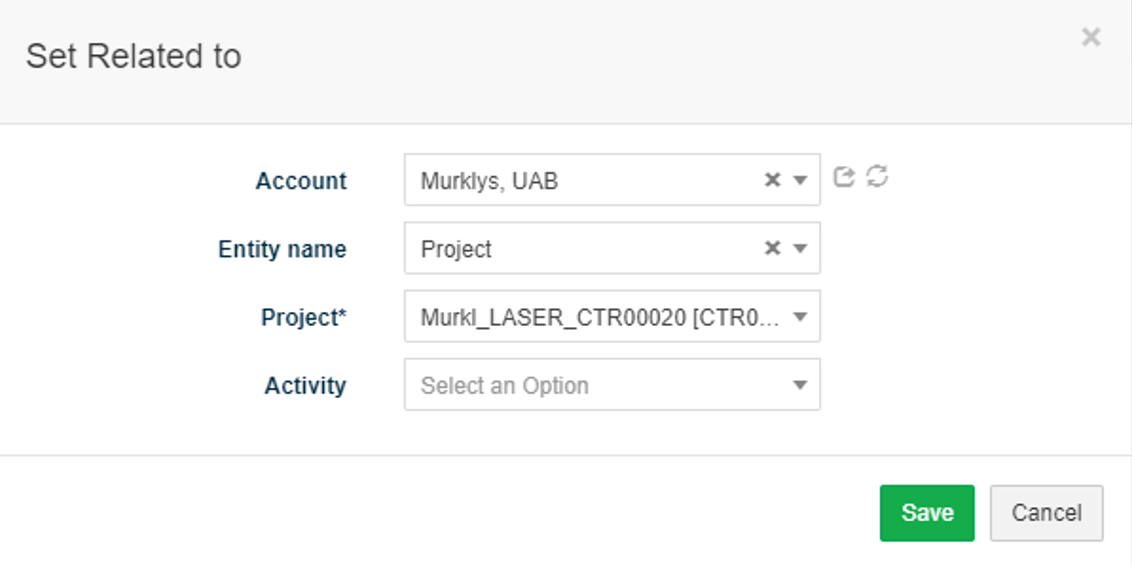
4. Set related to: button allows defining default “Related to” entity for Tasks.
5. Activation of O365 or/and Google account. The account is activated by clicking on the functional button ![]() and selecting a O365 or Google account
and selecting a O365 or Google account 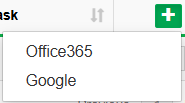 .
.
Settings:
Sync calendar ON/OFF – calendar synchronization is turned on/off. When you connect an account, you need to set the ON setting.
Private ON/OFF – parameter is set to ON if user account must be private. User only uses calendar to mark employment. Only used in exceptional cases.
Sync ahead – selects the synchronization period from the choices: 2 weeks, Month, 3 months, or Year.
Default project – sets the project to which time records will be linked to synchronize from the O365/Google calendar.
Copy from WiseTeam ON/OFF – the setting is turned on if you need records to be copied from the WiseTeam calendar to the O365/Google calendar.
Create task ON/OFF – the setting is turned on if synchronized time records in the O365/Google calendar must be created to a task in the WiseTeam system.
6. There is a possibility to sign in to Google and connect WiseTeam and Facebook accounts. After signing in to Google, Timesheets and Google Calendar will be synchronized. After signing out from Google Wiseteam events will be removed from Google calendar. After connecting WiseTeam and Facebook accounts it will be possible to log in to WiseTeam with Facebook account.
7. There is a possibility to assisign your email account to the system and manage your emails from WiseTeam.
To define email used to receive, send and assign emails in the system follow these steps:
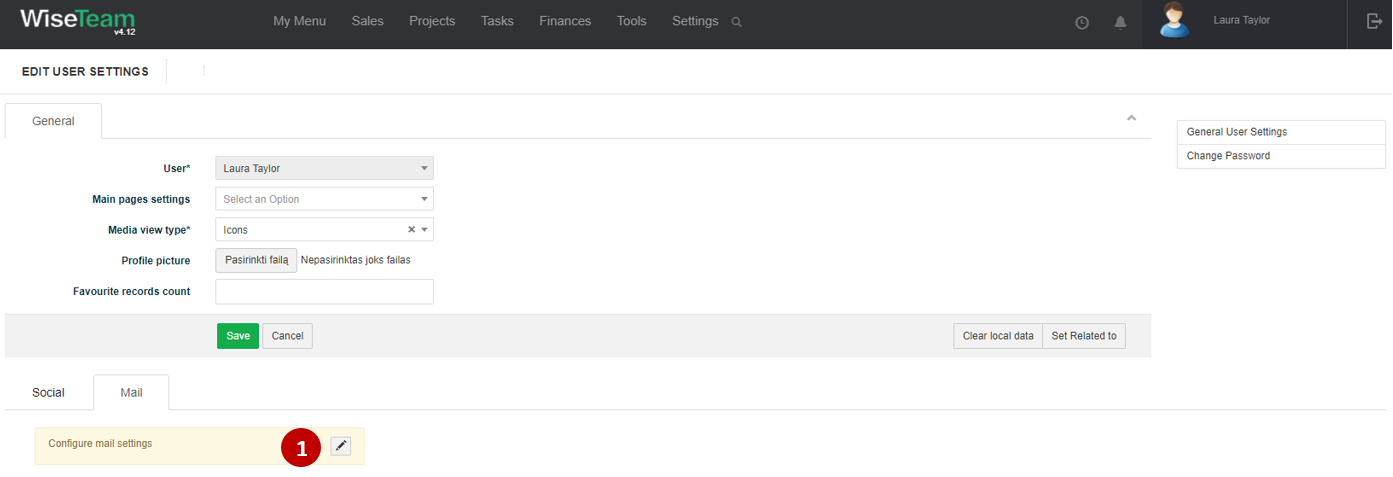
- After choosing Mail Tab, click Edit button in „Configure mail settings“ line.
- Fill in the required information, including your email signatures, which you would like to use:
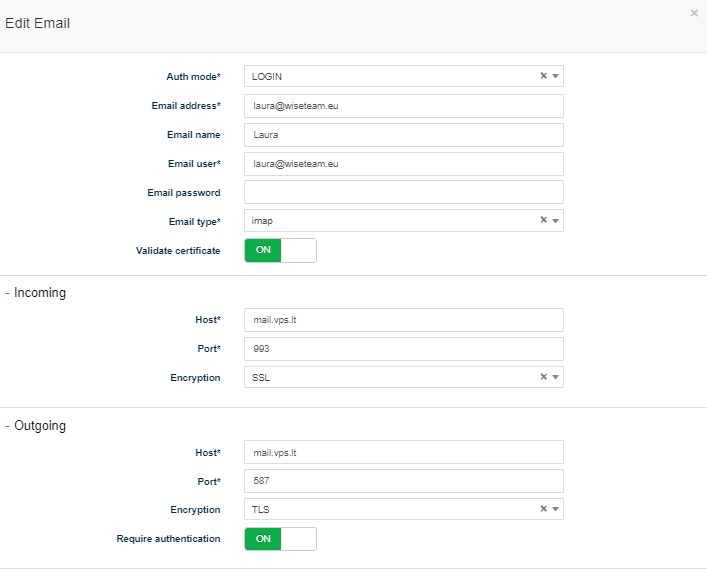
Settings for 2FA (two factor authentication):
3. Click Save.
4. You can test your connection by clicking on Test connection button:
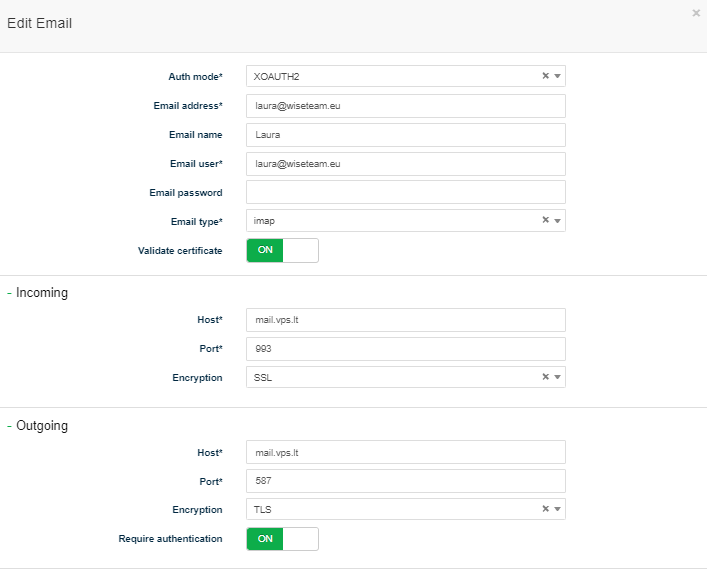
For 2FA press ![]() , enter the email password, and accept permissions. Two factor authentication completed.
, enter the email password, and accept permissions. Two factor authentication completed.
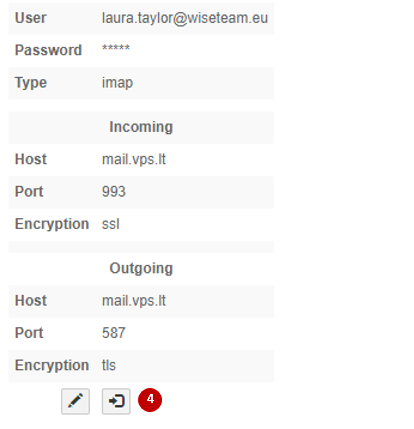
5. After email settings have been set up correctly, system will provide you a message once initial email synchronization will be completed.
You can manage your emails in Tools -> Mail section.
It is possible to set option to not save unrelated mails: Settings -> User settings -> Mail -> Edit email -> Advanced -> Save unrelated mail.