Navigation: Settings → Dictionary
Dictionary provides user with rights of customizing general information found in the following categories:
1. Dictionary: used to customize values chosen from drop down lists, for example communication types, incident status, problem priority, etc.
2. Budget Lines: used to edit or create new budget lines.
3. Opportunity stages: used to edit or create new Opportunity stages and define the probability to sign a Contract.
4. Countries: used to edit or create countries.
5. Cities: used to edit or create cities.
6. Districts: used to create districts.
7. Blocks: used to create blocks.
8. Locations: used to edit or create locations used for trainings. Add location’s title, Account and address (address can be defined independently from Account location). This functionality is used by training companies.
9. Currencies: used to set active and default currencies.
Customize values chosen from drop down lists
To edit values or add new value in the particular drop down list follow these steps:
1. Go to Settings → Dictionary → Dictionary.
2. Select particular drop down list by clicking on the title of the drop down list or by clicking ![]() button.
button.
3. To add new value click ![]() button.
button.
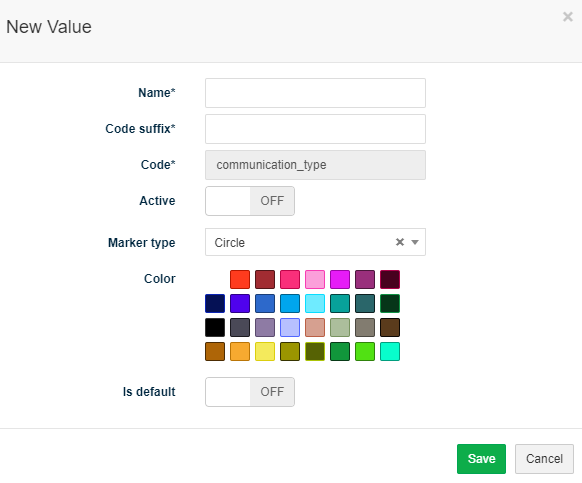
4. Fill in value information:
- Name: value that will be added.
- Code suffix: code suffix of the value. e. g. you can repeat the name of the value.
- Code: value filled automatically.
- Active: turn ON to activate the value. In case it is turned OFF the value will not be provided in the drop down list showed in the form.
- Marker type: it is possible to define how value should be marked in the list. Available options: no marker, colored circle in front of the value, colored background of the value label or colored dot in front of the value.
- Color: color of the marker.
- Is default: turn ON to set value as default.
5. Click Save.
6. Define values sequence in the list by using arrows in column Sort.
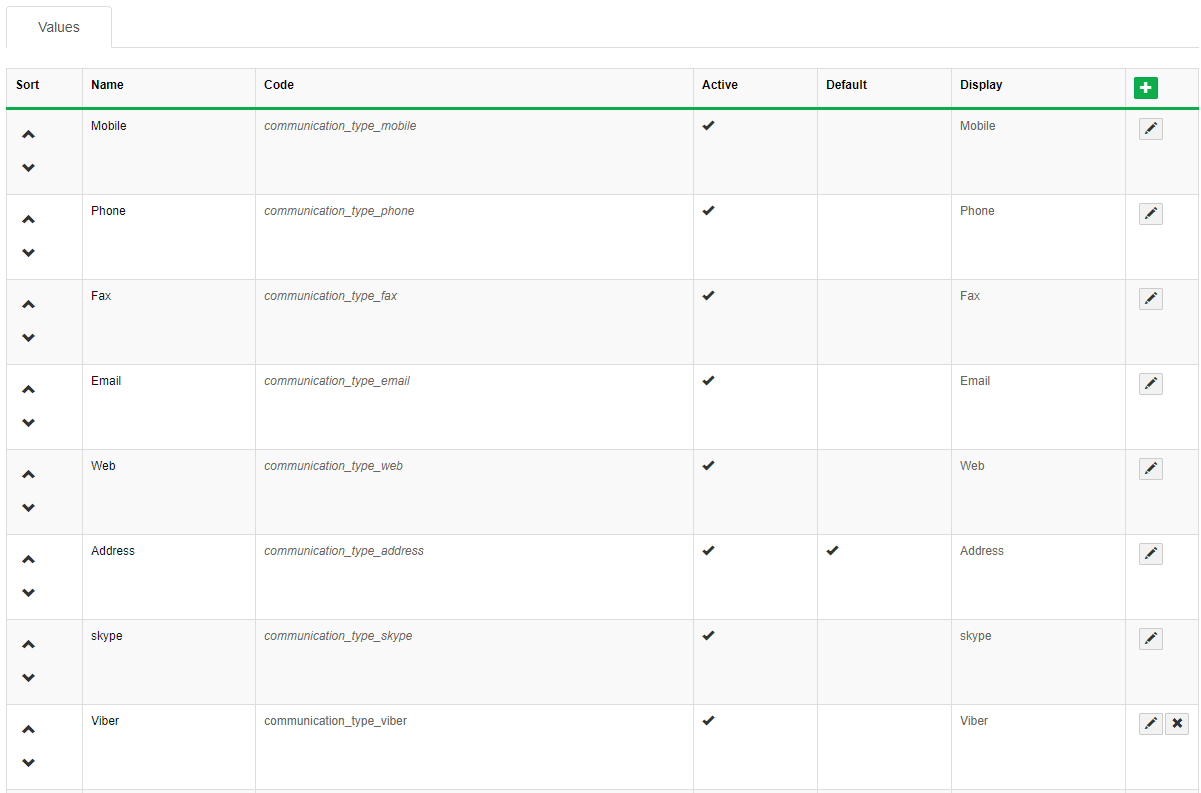
7. To edit value (change name, activate / deactivate, set as default) click ![]() button or click on the name of the value, make changes and click Save.
button or click on the name of the value, make changes and click Save.
Customize budget lines
This option is used to define which budget lines have to be added to the budget (Finances → Budget).
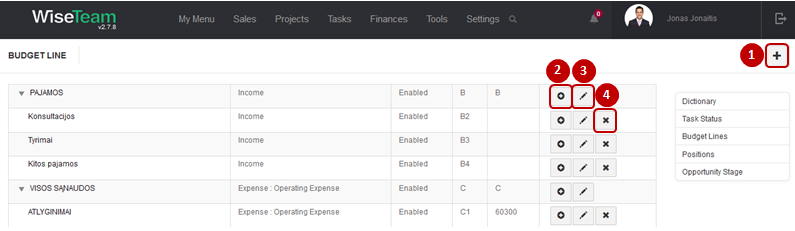
1. There is a possibility to create multiple parent budget lines by clicking ![]() button.
button.
2. Multiple subcategories can be created for single parent budget line by clicking ![]() button.
button.
3. Click ![]() to edit a budget line.
to edit a budget line.
4. Click ![]() to delete a budget line. Note: it is possible to delete only budget lines that do not have any subcategories.
to delete a budget line. Note: it is possible to delete only budget lines that do not have any subcategories.
To create new budget line follow these steps:
1. Go to Settings → Dictionary → Budget Lines.
2. Click ![]() button.
button.
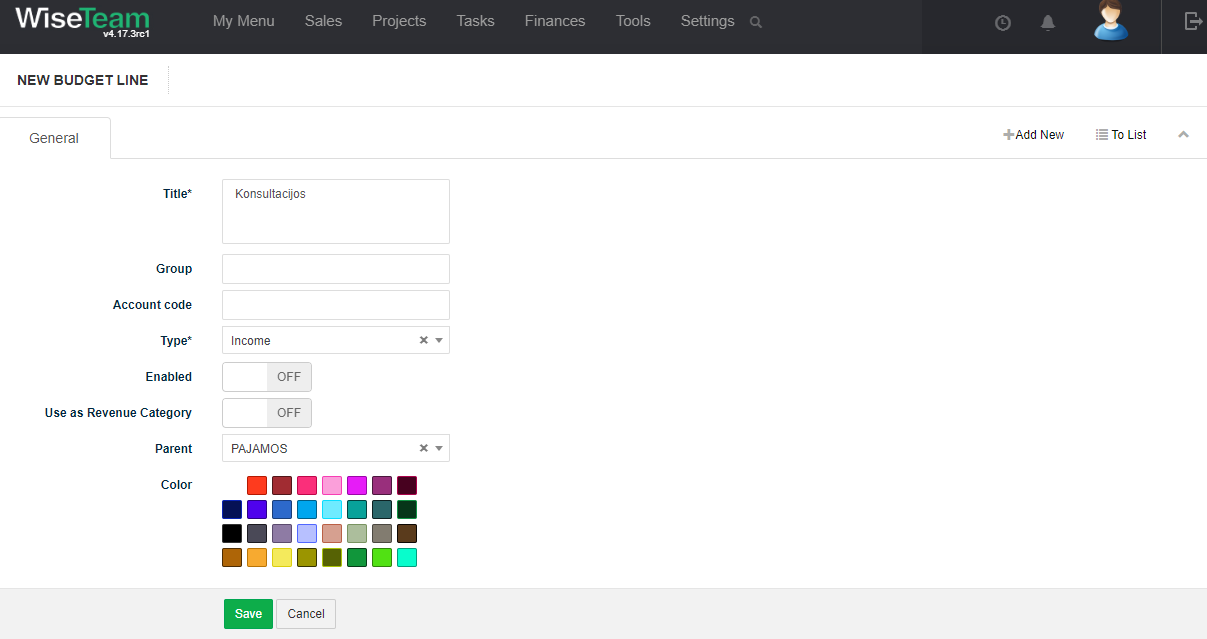
3. Fill in budget line information:
- Title: title of the budget line.
- Group: code of the budget line group entered manually (e. g. you can enter groups similar to WBS – defining parent groups as A, B, etc., subgroups as A1, A2, A3, B1, B2, B3, etc.)
- Account code: account code used in the chart of accounts.
- Type: type of the budget line (Income or Expense).
- Expense type: type of the expense (Operating Expenses or Cost of Sales). This field is active when type of budget line is Expenses.
- Enabled: turn On to enable budget line. In case it is turned OFF the budget line will not be provided in the budget.
- Use as Revenue Category: turn On to show value as a revenue category in the drop down list in Contract form. This option enables to assign Contract revenue to particular budget line.
- Parent: parent budget line.
- Color: color of the marker.
4. Click Save.
To edit budget line click ![]() button in the list of Task statuses or click on the title of budget line.
button in the list of Task statuses or click on the title of budget line.
Customize opportunity stages
There is a possibility to add new opportunity stage or edit existent stages.
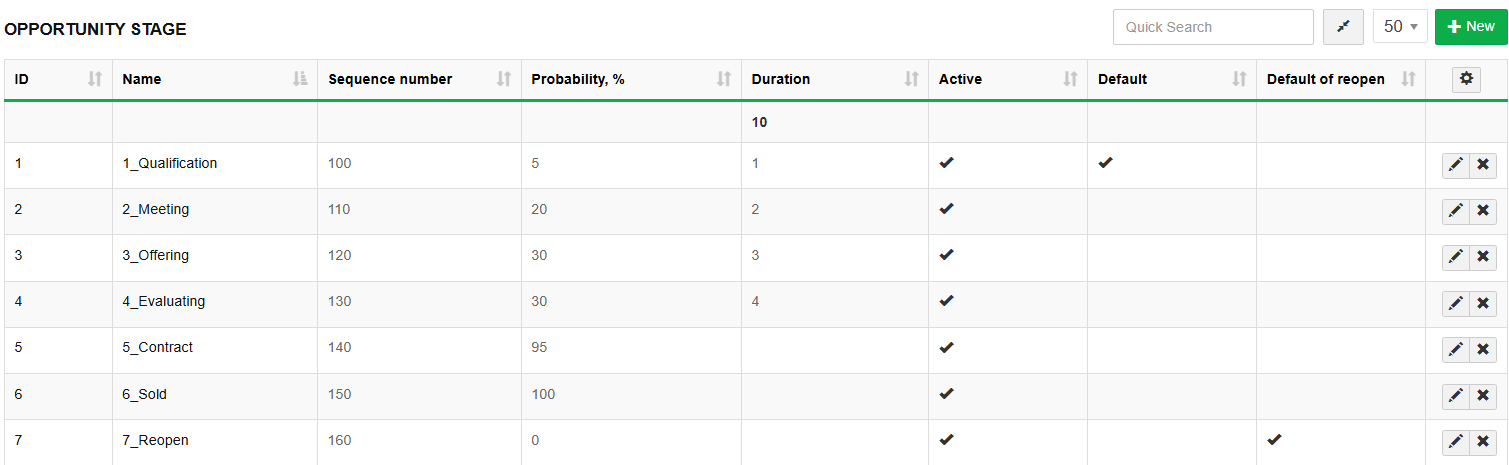
To add new opportunity stage follow these steps:
1. Go to Settings → Dictionary → Opportunity Stage.
2. Click ![]() button.
button.
3. Fill in opportunity stage information:
- Name: name of the opportunity stage.
- Sequence number: sequence number in the list and pipeline.
- Description: description of the opportunity stage.
- Probability: probability to sign a Contract (in percentage).
- Duration: standard stage duration that will be used to set planned finish date for opportunity stage.
- Is reopen default: the parameter is enabled if the stage needs to be reset to which closed opportunity will reopen.
- Is default: the parameter is enabled if the stage must be default when creating a new opportunity.
- Active: turn On to enable opportunity stage. In case it is turned OFF the opportunity stage will not be provided in the opportunity stage tab.
4. Click Save.

To edit opportunity stage click ![]() button in the list of opportunity stages.
button in the list of opportunity stages.
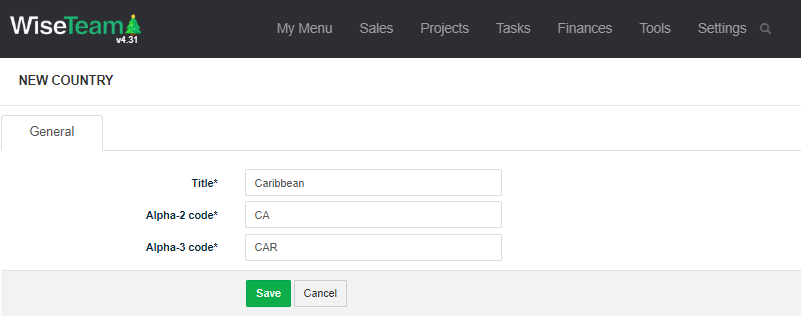
Customize countries
There is a possibility to add new or edit countries.
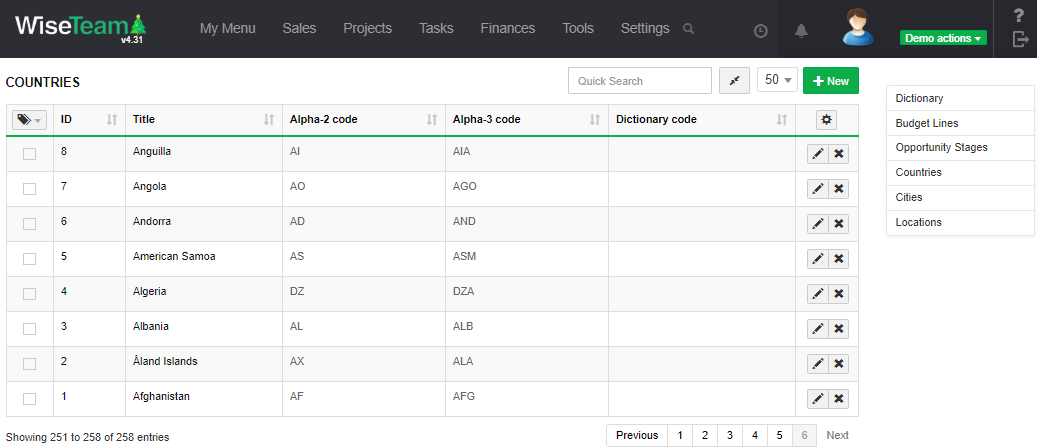
To add new countries follow these steps:
1. Go to Settings → Dictionary → Countries.
2. Click ![]() button.
button.
3. Fill information:
- Title: name of country.
- Alpha-2 code: country code from two letter.
- Alpha-3 code: country code from three letter.
4. Click Save.
To edit country click ![]() button in the list of country. To delete country click
button in the list of country. To delete country click ![]() button in the list of country.
button in the list of country.
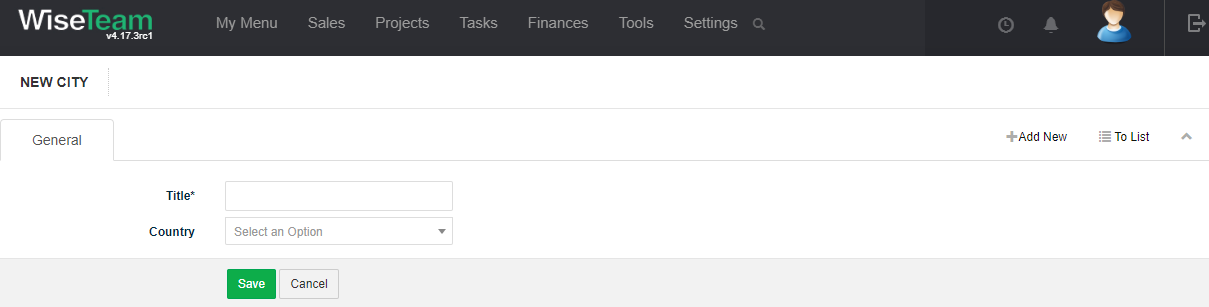
Customize cities
There is a possibility to add new or edit cities.
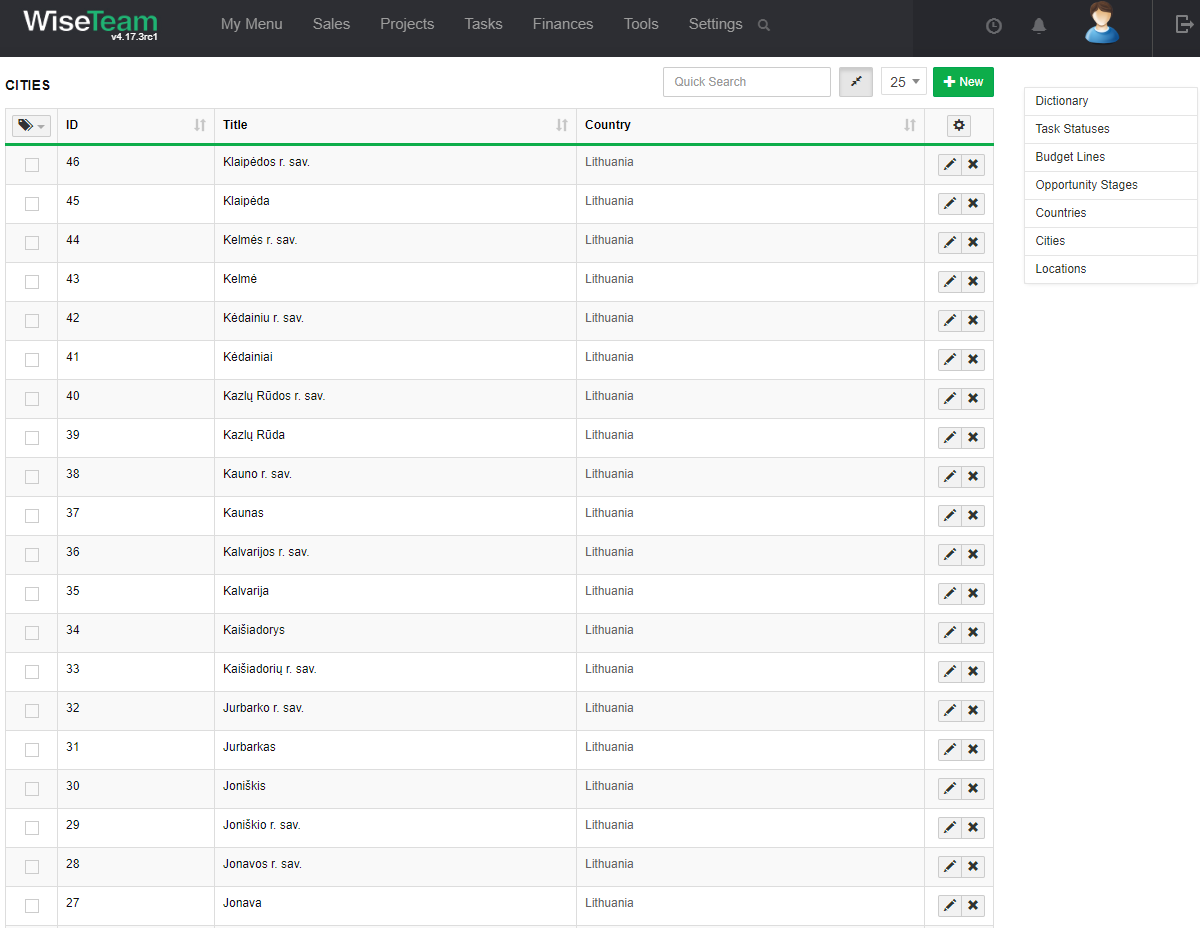
To add new cities follow these steps:
1. Go to Settings → Dictionary → Cities.
2. Click ![]() button.
button.
3. Fill information:
- Title: name of city.
- Country: select country.
4. Click Save.
To edit city click ![]() button in the list of cities. To delete city click
button in the list of cities. To delete city click ![]() button in the list of cities.
button in the list of cities.
Customize location
There is a possibility to add new or edit location.
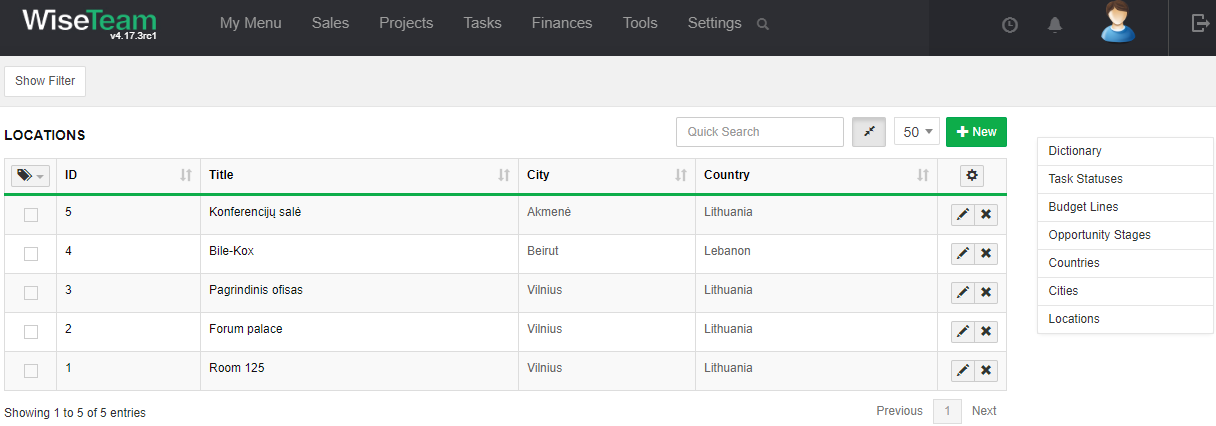
1. Go to Settings → Dictionary → Location.
2. Click ![]() button.
button.
3. Fill information:
- Title: name of location.
- Account: select an account.
- Country: select a country.
- City: select a city.
- Street address: address of location.
- Post code: post code of address.
4. Click Save.
To edit location click ![]() button in the list of location. To delete location click
button in the list of location. To delete location click ![]() button in the list of location.
button in the list of location.