Navigation: Settings → Groups
Used for creating new groups of Account, Contact, Lead, Opportunity, Contract, Knowledge Management, Risk, Incident, Problem, Issue, Change request, Media and other system objects. Groups can be used to simplify view of various tables using Filter → available Group functionality, easily create audience for Campaign, etc.
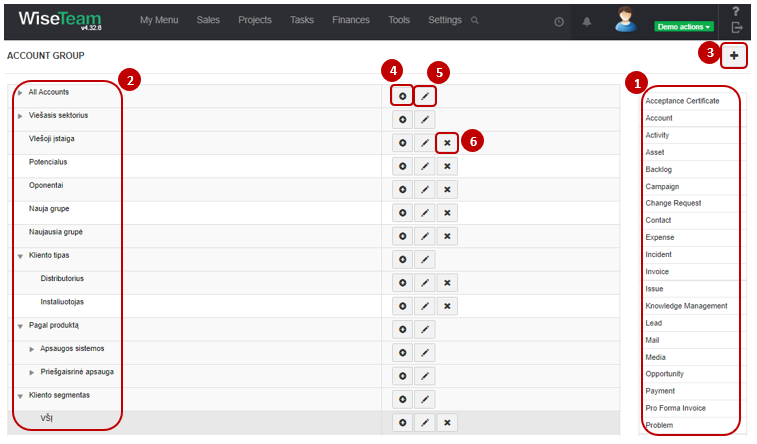
1. Categories for which it is possible to create groups are provided on the right.
2. Groups (parent groups and subgroups) available for selected category are provided on the left.
3. Multiple parent groups can be created for single category. Click ![]() to create new parent group. There is a possibility to create new Group when assigning record to a group.
to create new parent group. There is a possibility to create new Group when assigning record to a group.
4. Multiple subgroups can be created for single parent group. Click ![]() to create new subgroup.
to create new subgroup.
5. Click ![]() to edit a group.
to edit a group.
6. Click ![]() to delete a group from list. Note: it is possible to delete only groups that do not have any subgroups.
to delete a group from list. Note: it is possible to delete only groups that do not have any subgroups.
Create new parent group
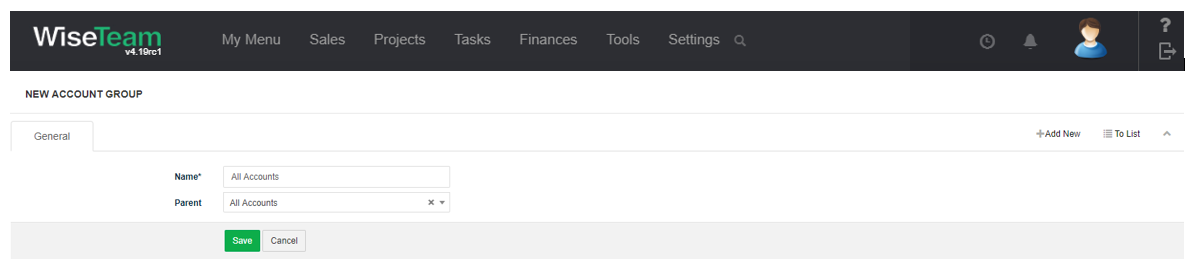
To create new parent group follow these steps:
1. Open the interested category from the list on the right.
2. Click ![]() button to create new parent group.
button to create new parent group.
3. Fill in the name of the parent group, choose its parent.
4. Click Save.
Create new subgroup
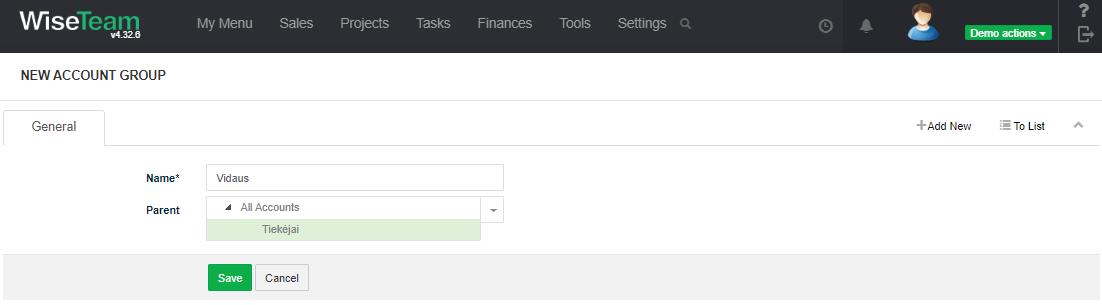
To create new subgroup related to parent group follow these steps:
1. Click ![]() button in the parent group line to create new subgroup.
button in the parent group line to create new subgroup.
2. Fill in the name of the parent group, parent is filled in automatically.
3. Click Save.
Create new group when assigning record to a group
To create new Group when assigning record to a group in a record form or list:
1. Click Create parent group.
2. Fill name of the group.
3. Group saved automatically when click anywhere.
4. Click ![]() to create subgroup of parent group.
to create subgroup of parent group.
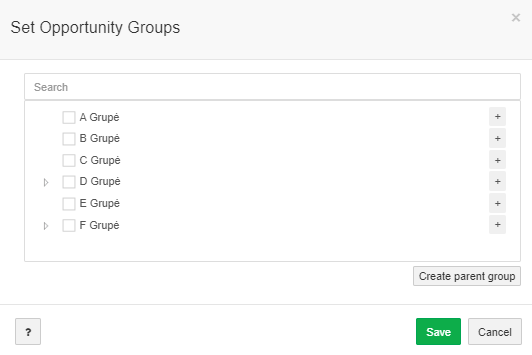
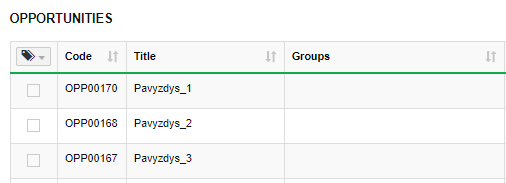
Set group in the list
Group assignment from list
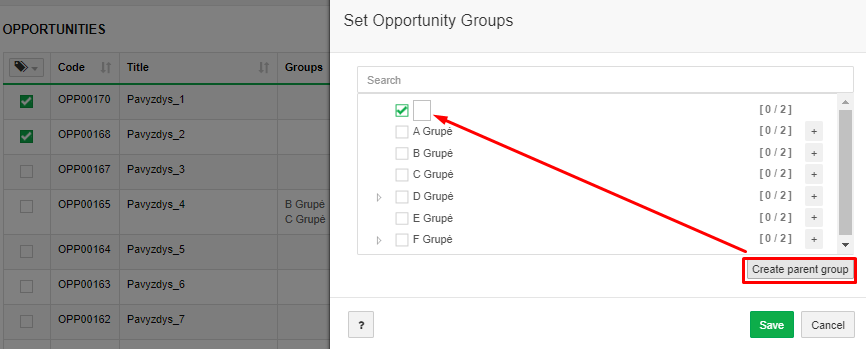
Selecting one or more records and with function Set→Group activates the group assignment dialog box.
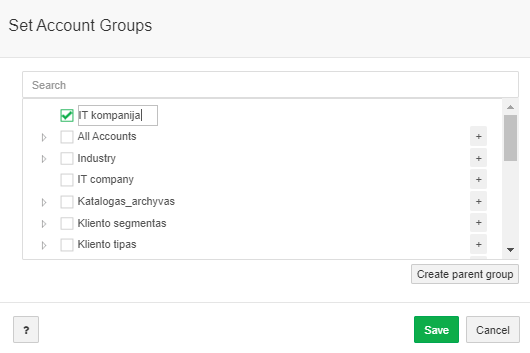
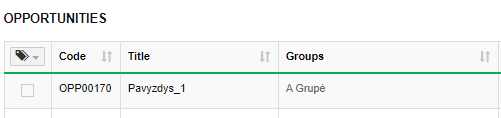
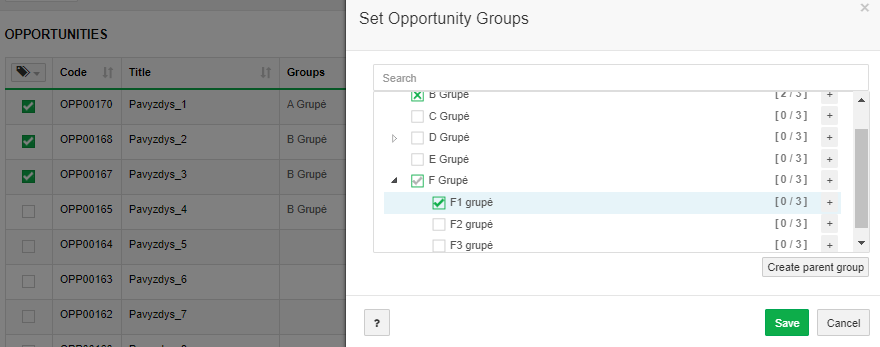
1. Assignment of a group to a single record for which no group is assigned.
When you select a record on the left, select the selected group in the dialog form, and save changes, the group is assigned to the record.
Result
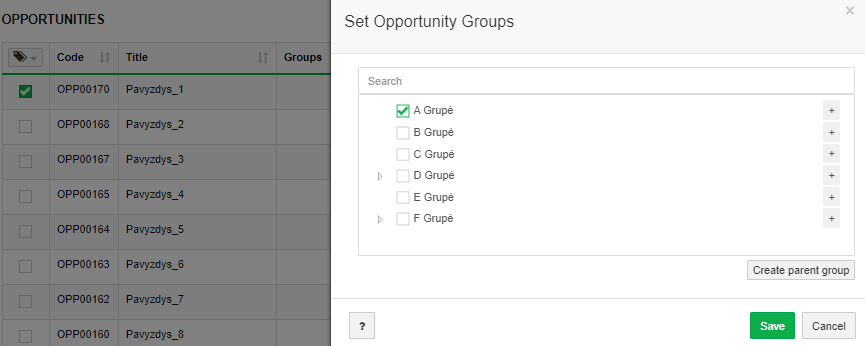
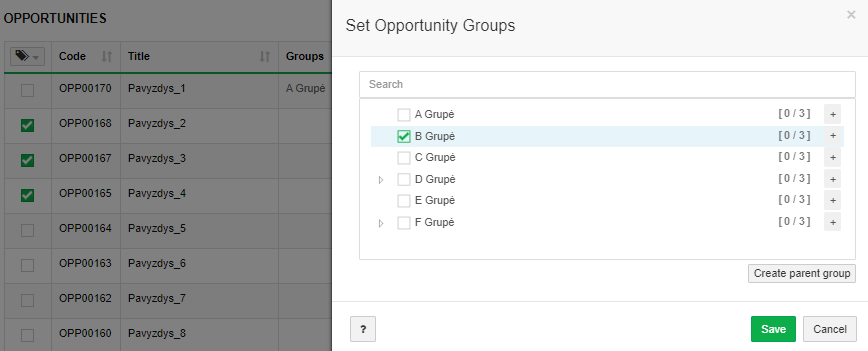
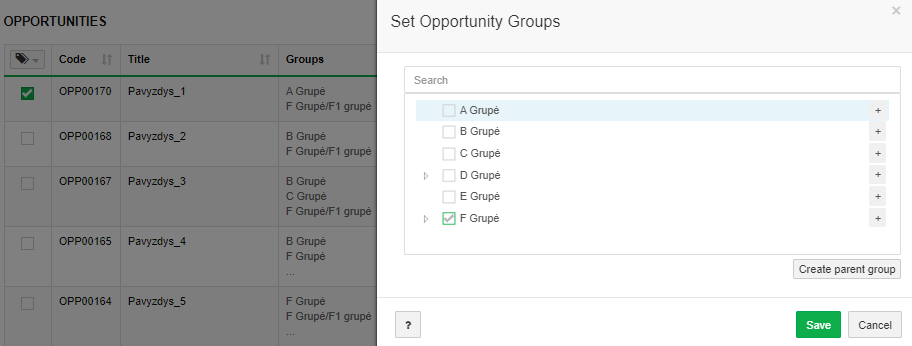
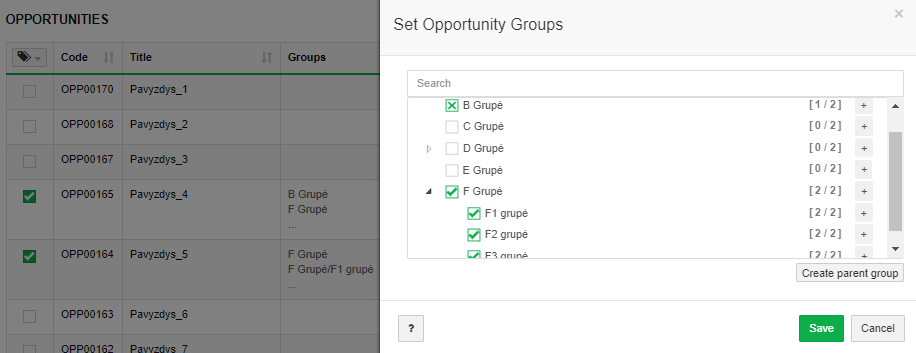
2. Assignment of a group to more than one record and no group is assigned
When you select entries on the left side, select a group in the dialog form, and save changes, the group is assigned to the records.
Result

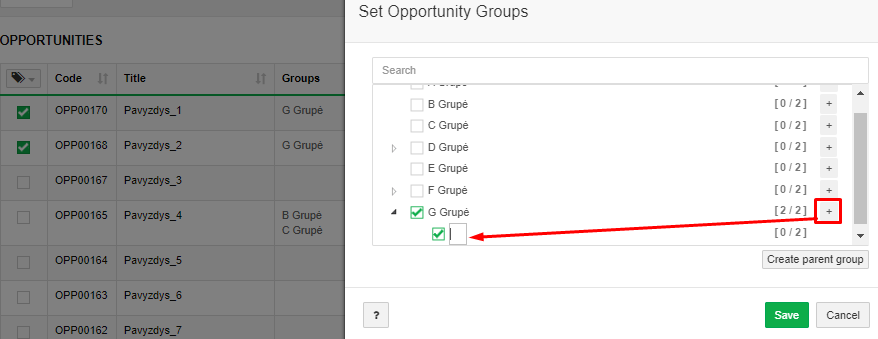
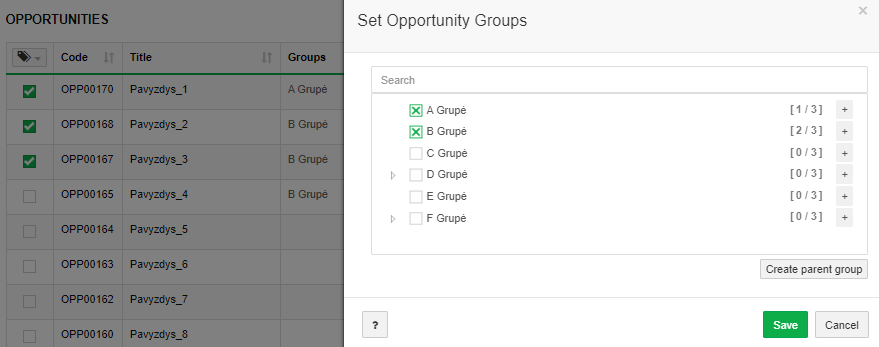
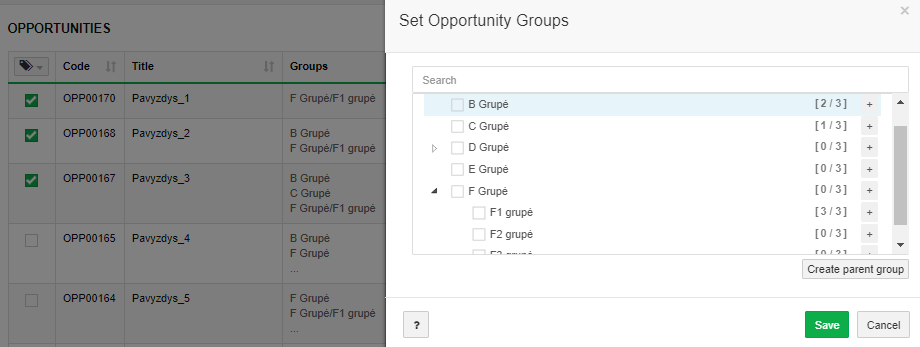
3. Assignment of a group to multiple records when groups already exist
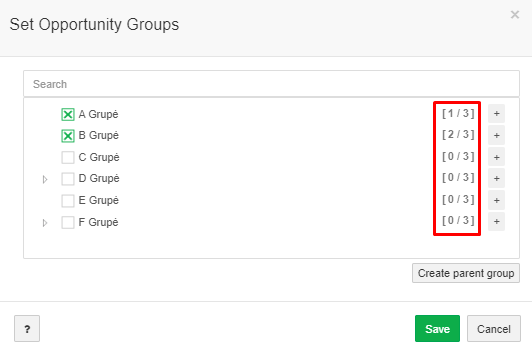
If the selected entries have different assigned groups, the dialog form indicates a green x to groups that are assiged to at least one record. Numbers for each group in fractured brackets indicate how many assigned groups have the selected number of records.
[x/y]
x – Number of records to which the group is assigned
y – Quantity of Posted Records
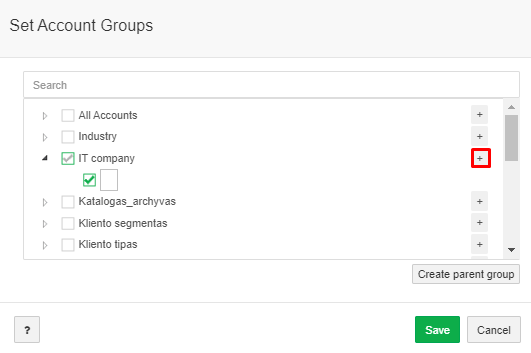
When one child group is selected, a grey check mark appears near the parent group, meaning that not all children’s groups are marked in the parent group.
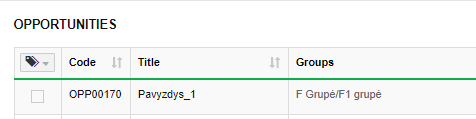
When changes are saved, groups are assigned and represented to selected records
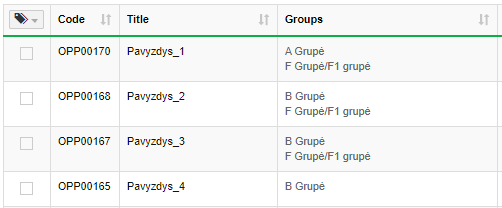
Group changes are saved to records only to the extent that they were last made. The child group is represented with the parent through the symbol “/”.
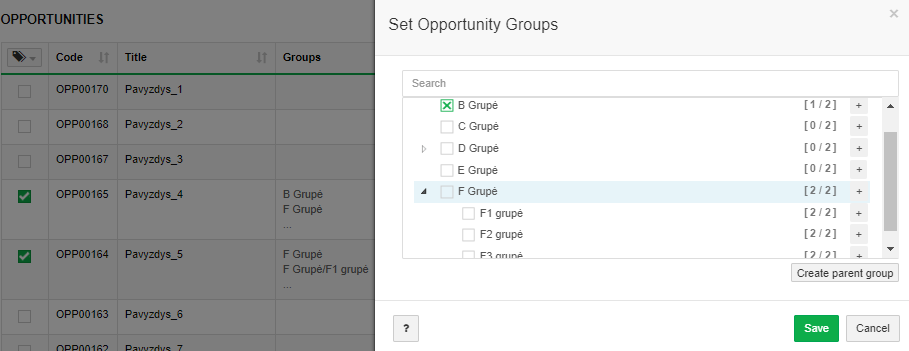
When selected entries have the same assigned groups, a green check mark is displayed to the groups.
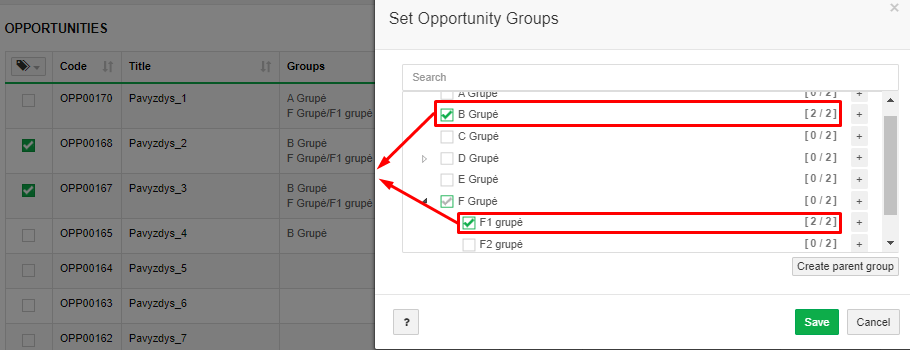
When all tree groups are selected in the dialog form, the parent group tag is represented with a green check mark. When a parent group is selected, all his children’s groups are automatically tagged.
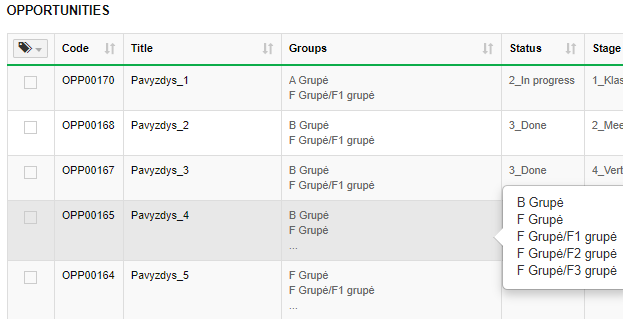
When you save changes, groups are assigned to selected records. If the list Groups field does not fit all assigned groups into the field frame, assigned groups can be viewed by starting the mouse on the group field to the record.
Group Removal
1. Removal of the group through the list
Removing a group through a list is done through the same function as assigning to the left by selecting entries and selecting from the Set → Groups dialog form menu.
Removal of the group for one selected record
When you select a record on the left side by selecting a group in the dialog form and saving changes, the group is removed from the selected record.
Result
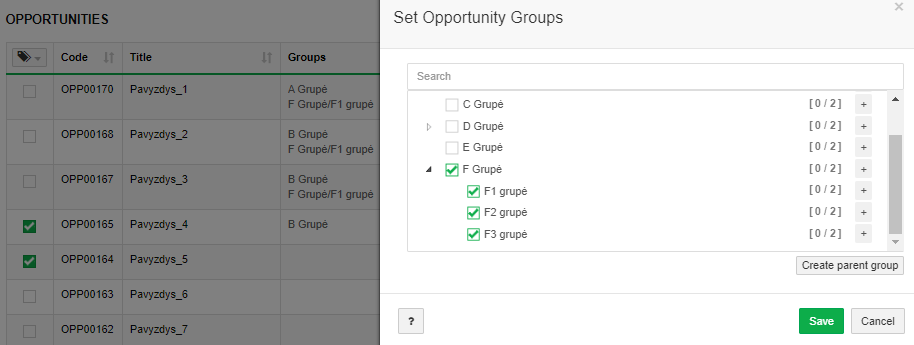
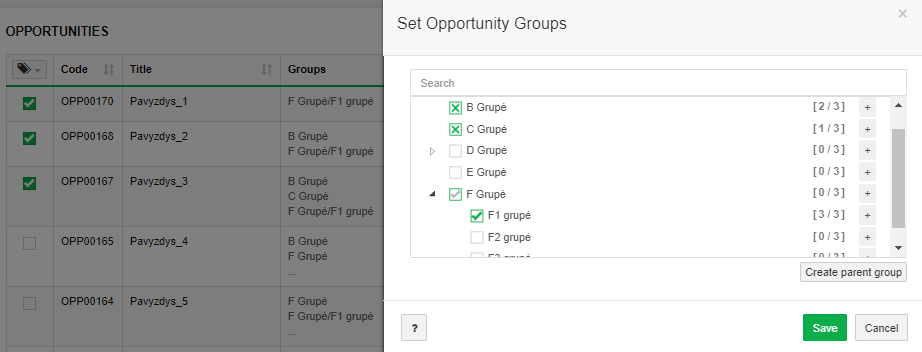
2. Removal of the group for more than one selected record
When you select multiple entries with different assigned groups on the left side, the dialog sheet selects groups that will be removed from the selected records.
Green x indicates to groups that not all records have an assigned group. The green check mark next to the child group indicates that the group is assigned to all selected entries. A gray check mark near the parent group indicates that not all children’s groups and not all records have an assigned group tree.
Group removal is done by selecting selected groups. If one of the children’s groups is assigned to the record, the group removal is done by selecting the child group.
For the record, the group will be removed when the selected group is neither marked with x nor a check mark.
Result
One group is removed for records. When one tree in a group is selected and saved, changes are saved to the selected entries, and groups remain assigned.
Result
3. Create groups through dialog form
The parent group is created using the Create parent group feature in the dialog form.
The child group is created through a function ![]() in the dialog form near the groups.
in the dialog form near the groups.