Navigation: Settings → Checklists
Option is used to create predefined checklist templates that can be reused when creating checklists for different processes, projects or users. A checklist template consists of multiple checklist lines that can be assigned to owners and planned durations.
Review checklist form
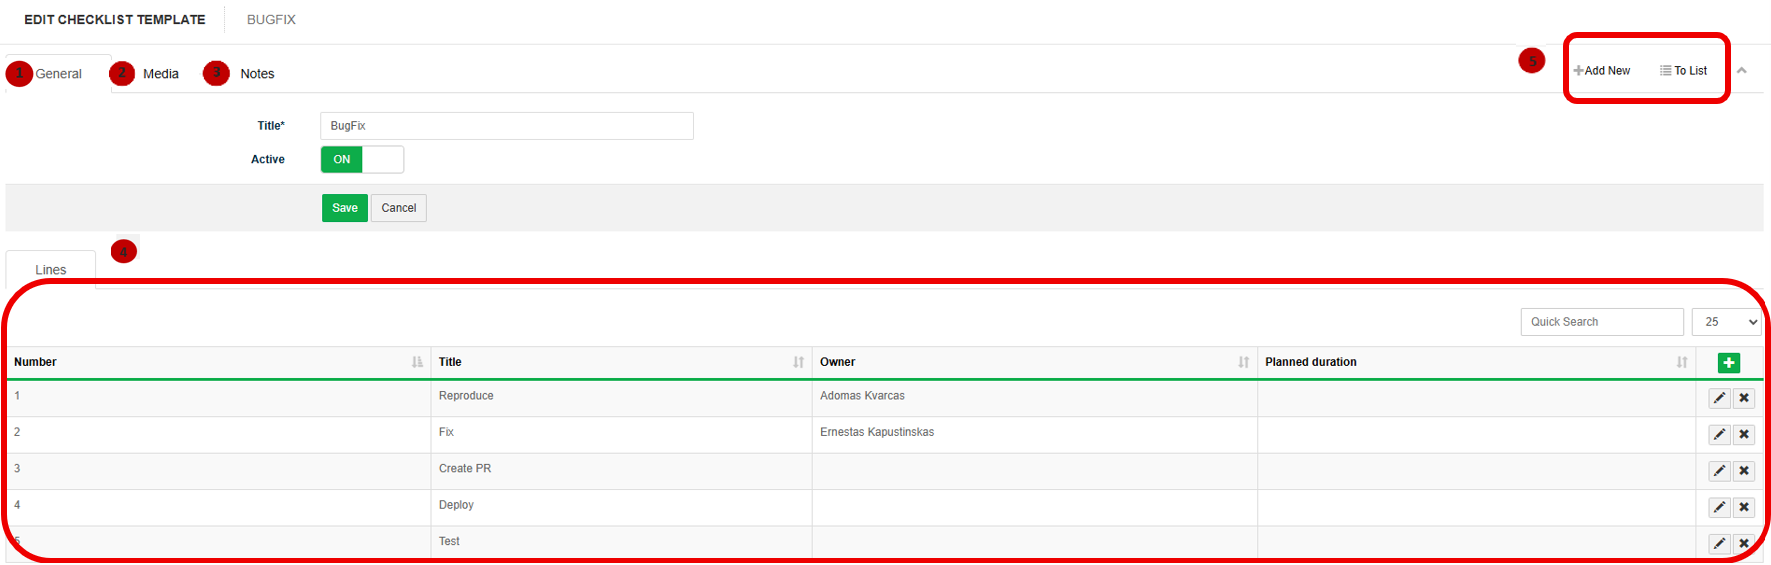
1. In tab General title and status of the checklist are provided.
2. In tab Media it is possible to attach files. Click Select Files or use Drag & Drop.
3. In tab Notes it is possible to leave notes. Click Add note to create a new note.
4. Lines section displays the checklist items with the following information::
- Number: sequence number of the checklist item.
- Title: description of the checklist item.
- Owner: responsible person or role.
- Planned duration: expected duration for completing the item.
Click  to edit a checklist.
Click  to delete a checklist.
5. Available navigation buttons:
- Add new: is used to create a new checklist.
- To list: is used to return to the list of checklist.
Create new checklist
To create new checklist follow these steps:
1. Go to Settings → Checklist.
2. Click  button.
3. In the General tab, fill in the checklist information:
- Title – enter the checklist name.
- Active – turn ON if the template should be available for use.
4. Click Save.
5. In the Lines section, click the + button to add a new checklist line.
6. Fill in the checklist line information:
- Number – sequence number of the checklist item.
- Title – name or description of the checklist item.
- Owner – user or role responsible for completing the checklist item (optional).
- Planned duration – estimated duration required to complete the checklist item (optional).
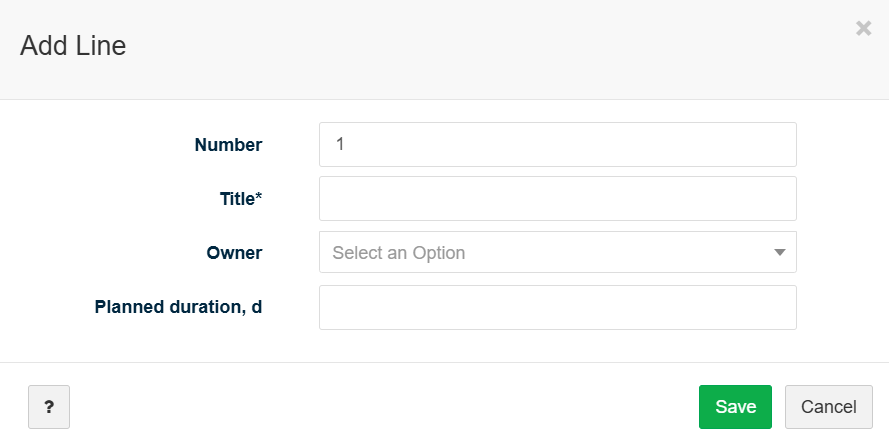
7. Click Save to add the checklist line.
8. Repeat steps 5–7 until all checklist items have been added.
9. Ensure the Active switch is turned ON to make the checklist template available for use.